Just like last week, there’s a first step for this week’s recipes that needs to be done a day ahead. Those dry beans need to soak!
That is, they need to soak in order to make it the way Angela makes them. There are differing opinions on this. Some say you don’t need to soak beans at all (especially smaller beans, like the black beans we’re using here), some say you should soak them with salt, some say never to soak them with salt–it gets confusing.
One thing that does seem to be true is that soaking ahead of time will shorten your cooking time, if you know that you’ll be crunched to get the food done before dinner time. With our recipe this week, the long cooking time allows the flavors to really come together, even if the beans themselves will be cooked before the three hours are up.
Important note:
As her bio in Heirloom Kitchen tell us, Angela is often making food not just for herself, not just for her kids, but for their kids as well. That’s three generations–a lot of mouths to feed. Which means that for us, it might not be necessary to make the batch as it’s written. A quick Google search reveals that the 2 1/2 pounds of dry beans in the recipe will yield 15 cups of cooked beans…which is almost a gallon of beans. For those of you adjusting, or using canned beans, The Spruce Eats has a handy set of conversions.
Decide for yourself how much you want to make, and adjust all of the ingredient measurements accordingly!
All that aside, as usual I’m going to try to make these recipes as close to the original as possible, so let’s get soaking!
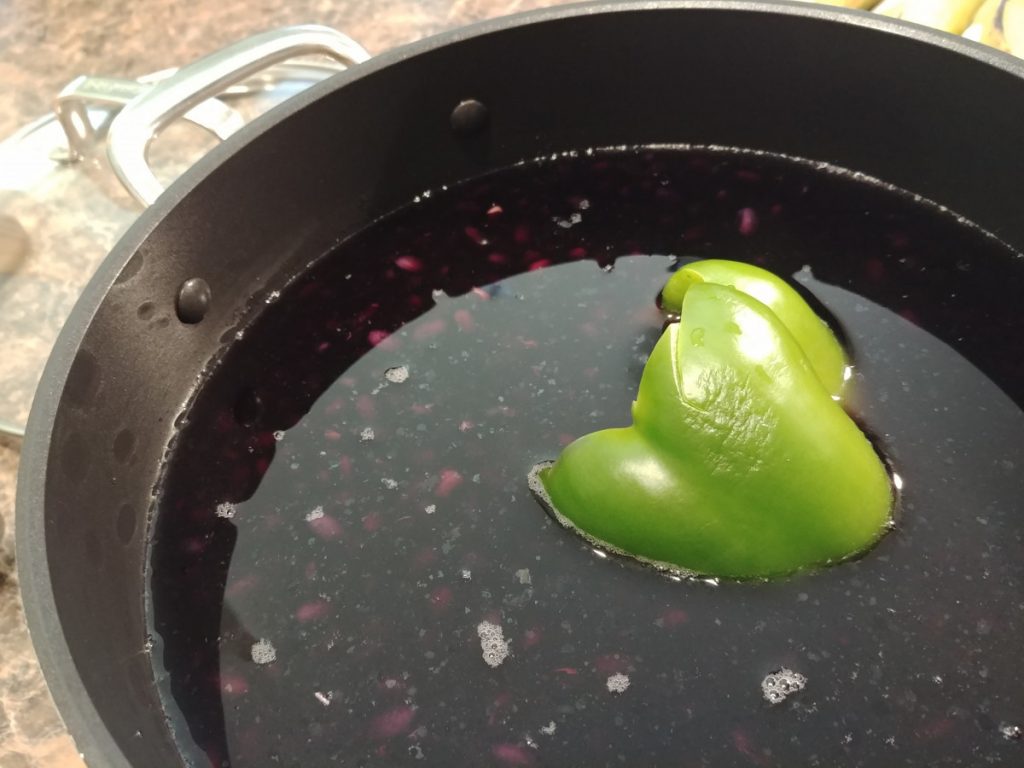
The next step has us put that pot with the beans on the stove, cooking them in the soaking liquid. Some say that you should always use fresh water–pouring off the soaking liquid and refilling the pot–and some argue there is a flavor benefit to using the same liquid. Cook’s Illustrated has some more information on that, but I’m trying to closely follow the recipe, so we’ll be cooking the beans using the same water they spent the night in. I think that it might be even more effective in this case, since the pepper was soaking as well, infusing the water with some of its flavor.
For a more well-informed background on sofrito and its travels, check out this Spruce Eats article.
Another good reason to cut this recipe in half: 2 large onions and 5 green bell peppers is a considerable amount of vegetables, and unless you have an impressive array of large pots, you’ll struggle–as I did–to find room for them. My large pot was already in use (and nearly full to the brim) of beans, and when I put the onions and peppers in the next biggest one to start the sofrito, they only just fit in.
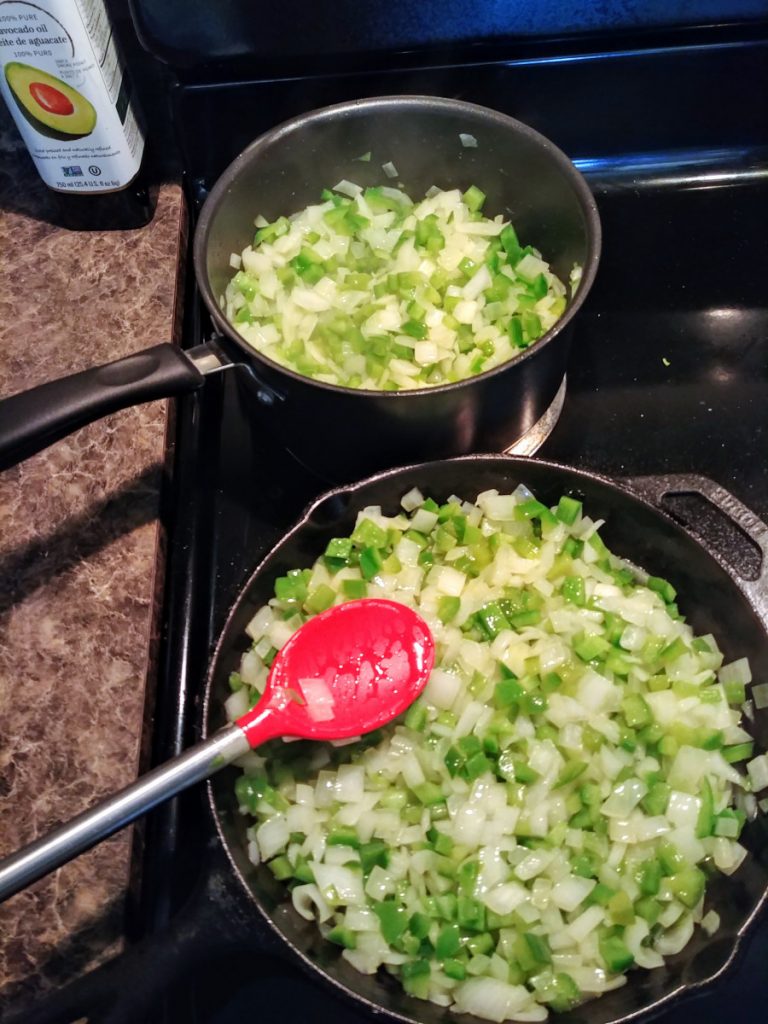
This meant that not only would I probably spill a bunch of diced veggies all over the stove as I stirred, but that the process of cooking the sofrito would take much longer. So after some deliberation (and spilled veggies), I decided to split it between the pot and a skillet, speeding up the process and keeping it neater.
Once the sofrito was pretty much at the point of cooked-ness that I wanted, I added the pimentos and some diced green chilis that I had on hand. Those ingredients are already cooked and soft, so here we’re just trying to get them heated, bringing their flavor out and dispersing it amongst the sofrito mixture.
As I say in the video, I don’t think pureeing the sofrito is 100% necessary; you’ll get essentially the same flavor if you just skipped the pureeing step and put the cooked onions and peppers straight into the beans.
However, that being said…I do think that it’s worth it to puree the mixture if you do have a processor. When the sofrito is pureed and stirred into the beans, you really achieve the desired effect of bolstering the flavor of the beans, while having the texture of the sofrito dissolve into the background–so you’d never know there was anything other than beans in the pot.
At this point, once the sofrito has been stirred into the black beans, they’re basically just hanging out and taking care of themselves. It’s at this stage, if you’re feeling bold and making all three of these recipes at once, that I’d say to start your tostones process.
Sometimes, like when the plantains you’re using are greener and less ripe than the ones I had, it’s not so easy to peel the skin off. In that case, instead of making one incision down the length of the fruit like I did, make four along its seams and tear the skin off in sections.
It’s possible to use less oil than I did, although unless you’re really babysitting them in the pan, it’ll be more difficult to get an even fry. I also like to use a lower temperature in situations like this. When you have to go through and flip each slice individually, it can get really hairy when time isn’t on your side. With a higher temperature, they’ll certainly fry faster, but by the time you’ve flipped the last slice, the first ones are starting to burn.
I prefer a more relaxed approach.
Once the plantain slices have achieved a nice, gentle golden brown, it’s time to pull them out for smashin’. For me, with the three plantains, the width I sliced them at, and the size of skillet I used to fry them, it took three rounds to get through it all.

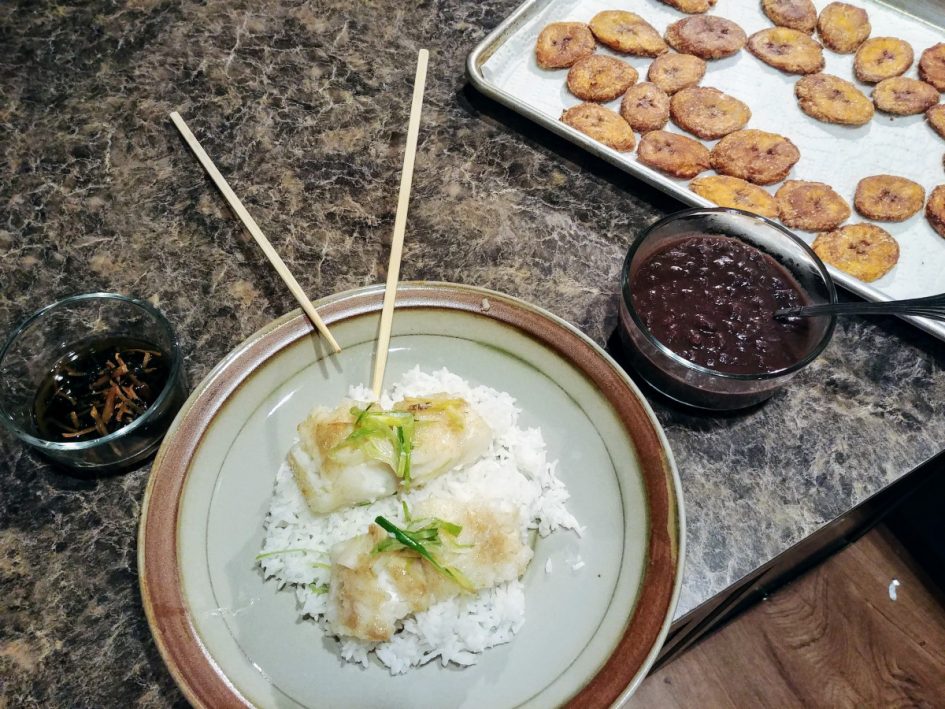
At this point, I’ve finished the process of frying all the batches of tostones, and I’m on to the olive oil additions to the black beans, as well as starting the fish.
Of all three recipes, the fish is by far the easiest, especially if you’ve got a steamer basket/steaming set up all ready to go. I didn’t, so the weird system in the video was what I had to come up with.
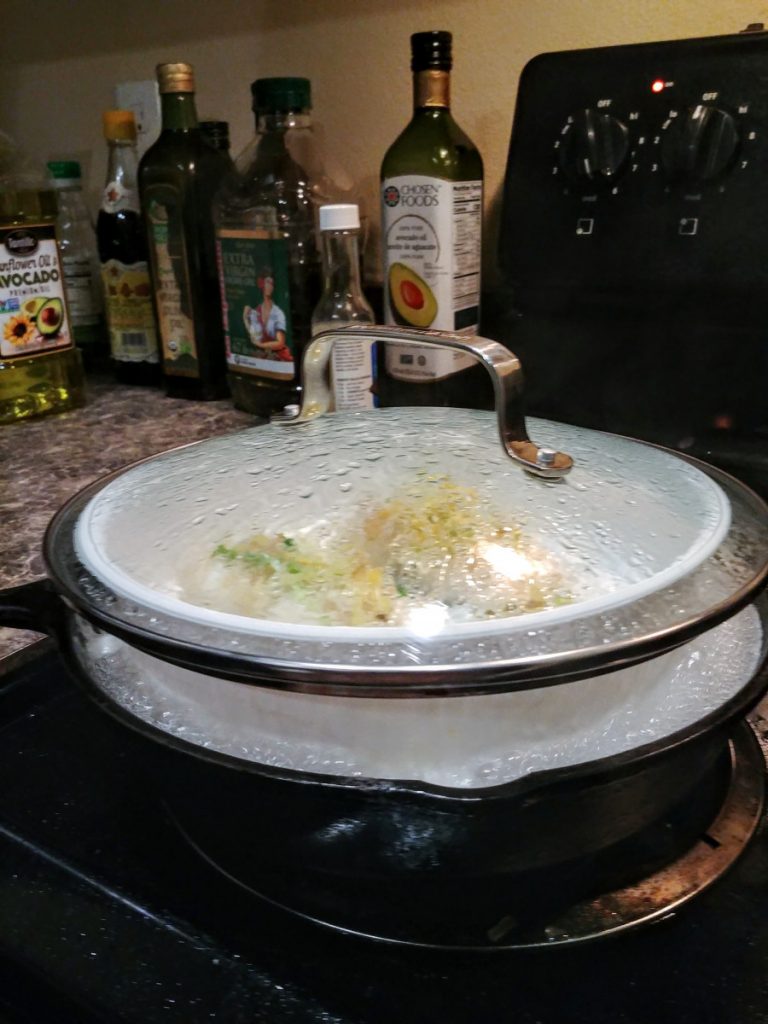
To be honest, I was a little surprised that this system worked. I have to steam fish all the time now! They turned out perfectly, lightly infused with flavor from the wilting scallion strips beneath and the ginger strips above.
Again, pretty much any flaky white fish will do here, so don’t feel like you have to spring for cod or halibut.
And now, without further ado, what we’ve all been waiting for…
Now that I’ve gone through the process of making all three of these things at once, I realize it’s a little ambitious. Probably not something you’ll spontaneously bust out for weeknight dinner. But, any one of these recipes alone is easy enough to make, and they all turned out really well.
So, again, what does it mean to eat well? I talked about the fact that there are some major categories in which we tend to group our answers: 1) health, 2) pleasure, and 3) convenience and ease of eating (snacking!). It is a fortuitous coincidence that this week Dunlop provides us with the following insight:
“Many Chinese friends have spoken to me over the last few years of a historical progression from ‘eating to fill your belly’ (chi bao), through ‘eating plenty of rich food’, (chi hao) to ‘eating skillfully’ (chi qiao).
Fuchsia Dunlop, Shark’s Fin and sichuan pepper (303)
So, let’s bring it back around to your responses for this lab.
- What does eating well mean to you?
- Does that meaning change depending on the circumstances? (e.g., eating during the COVID-19 pandemic/lockdown, eating on vacation, etc.)
- Do you find yourself choosing between eating well for your health and eating well for pleasure?
With your own answers to these questions in mind, how might you define the difference between eating “well” and eating “skillfully?”
Food for thought.
Leave a Reply