Spring 2021 – Week 2 Summary

So, I fell behind on my weekly posts already. To be honest, I didn’t do a lot in week 2. Well, nothing interesting. I was still quite exhausted from the first week; I really cannot emphasize how physical dyeing large quantities of yarn can be. I took it easy this week, mostly because I needed to. While I enjoy what I do and I want to do it all the time, my body just can’t keep up. Oh, the joy of being in my 30s and realizing my body doesn’t bounce back like it used to. I imagine that people who were/are dyers by trade must be sore quite often.

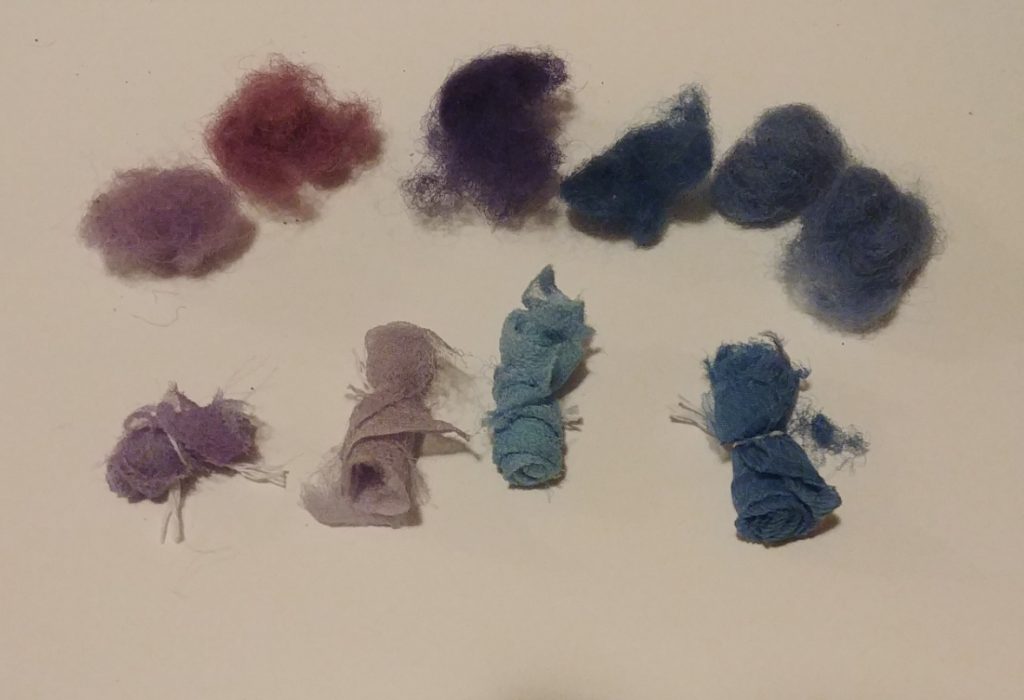
This isn’t to say I didn’t do anything – I did. The first thing was overdyeing my yarn dyed with madder and the yarn dyed with woad that I set aside for the inlay pattern. The madder gave the yarn a very nice pinkish orange color, but I wanted it redder, so I used cochineal to do the job. I truly enjoy working with cochineal. Not only does it give an amazing array of colors, it was important to my ancestors, which is a connection I hold dear. Now, I know how to make pure red with cochineal, but I decided to process it in a way to give more of a magenta – it’s the easiest color to get, and I figured the madder-dyed yarn already had a warm undertone to it and adding more of that wouldn’t make much of a difference.

And I succeeded! Sort of. It’s a a bit of a subtle difference, but it’s there. I left the yarn overnight in the cochineal bath in order for the yarn to soak up as much pigment as possible, which it did with the inlay yarn but not so much the madder-dyed yarn. I have a feeling that if I mordanted the yarn again it would soak of more of the cochineal, but I didn’t really want to keep subjecting the yarn to high temperatures. Also, while the color wasn’t quite what I wanted originally, I’ve grown to quite like it.

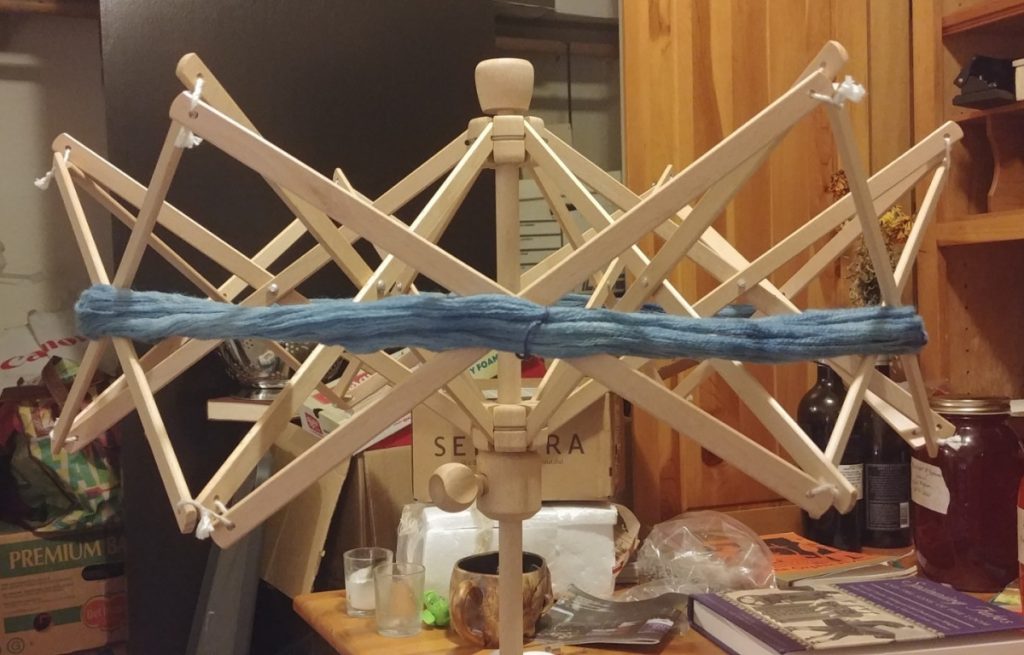
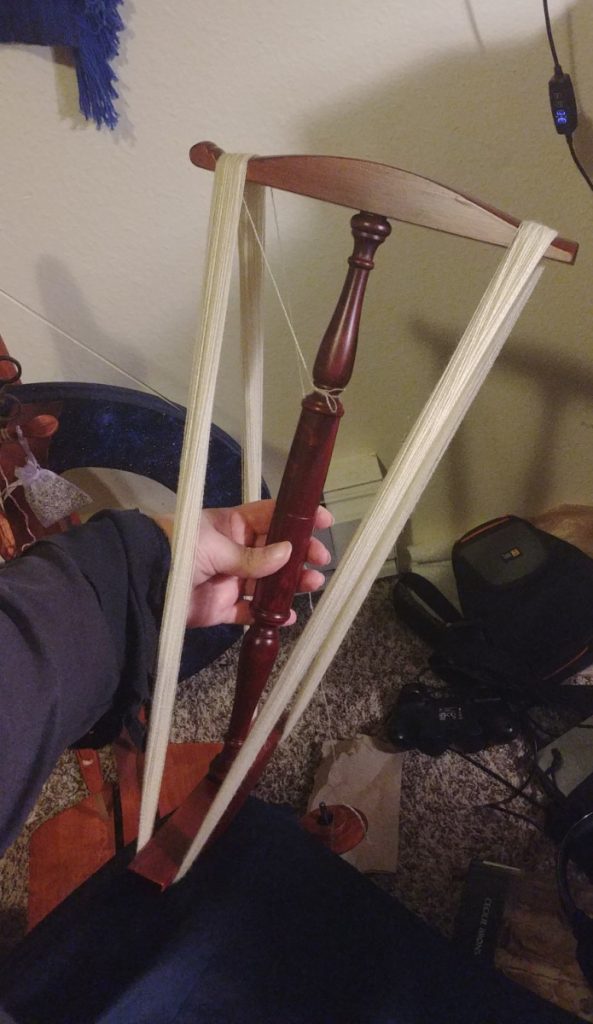
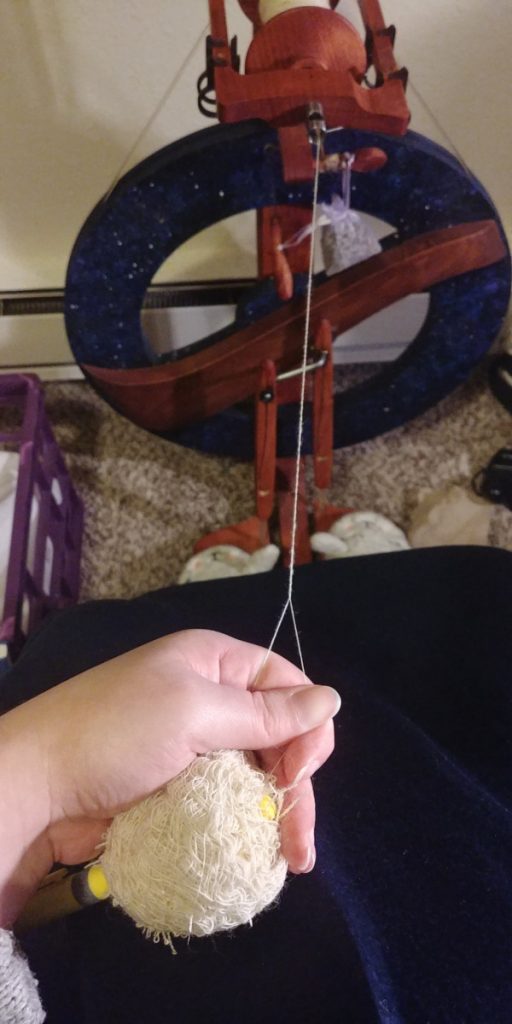
The other major thing I did was wind ALL of the yarn into balls. This…took a while. For some reason, the warp yarn felted a bit when I was dyeing it with woad. I honestly don’t know why – the woad bath wasn’t heated nor did I agitate the yarn at all. I had to separate the strands of yarn from each other before I could wind it up. I also decided at the last minute to buy a yarn swift. A yarn swift holds a skein of yarn and spins. Without it, I would have had to ask my partner to help me by holding the skeins while I wound it. The yarn swift was a bit pricey, but worth every cent. I thought winding the yarn into balls would be a quick task, but it really wasn’t. I feel like that right there is the theme of this whole project: I thought x would take a certain amount of time, but actually takes a great deal more of time than I thought.

My yarn swift. I think the picture explains what it is better than I can. As you can see, the swift holds the skein under a bit of tension, and will spin as I wind on the yarn into a ball.

Spring 2021 – Week 1 Summary

The first week of the spring quarter was busy, exhausting, and honestly a lot of fun. I decided to get all of my dyeing done in the first week, and I accomplished that goal, more or less (I had some over-dyeing I did in the second week). The first thing I had to do was measure out my warp. I wasn’t able to spin all of the yarn necessary to weave my chiton, so I went to a yarn shop in Tacoma, Fibers Etc., and bought an entire cone of laceweight yarn – this one is about 30 wraps per inch, which is a bit finer than what I want, but I can work with it. Did I have to buy the entire nearly 3 lb. cone? No. Did I want to sit in the shop for over an hour unwinding what I needed? Also no. It’s not like I won’t find a use for it! I still had to unwind what I needed, but I was able to do that in the comfort of my home.

I also needed to allot some of the weft for the stripes of red and yellow, as they obviously need to be dyed separately. I also decided to weave in a purple pattern in the yellow stripe using supplementary weft/inlay, which I’m going to let Wikipedia define for me: “An extra set of threads are woven into the weft between two regular weft threads to create an ornamental pattern in addition to the ground weave.” I tried to find a pattern online for what I wanted – a Greek key/meander pattern – but I couldn’t find anything. So, I had to figure it out myself and let me tell you, was that challenging. I’ll let the picture speak for itself:

It was difficult creating a pattern that would only be about an inch tall, but that would still be bold enough to be noticeable. Also, I didn’t want the pattern to suddenly be cut off at the edge, so I had to make sure it would fit within the amount of warp strings I plan on having.

Once all of the yarn was measured and sorted, I was now ready to start the dyeing process. First step: scouring. I believe I’ve talked about scouring before when I was starting with my fleece. It’s a good idea to clean yarn before dyeing it, as any dirt and especially oils will prevent the yarn from absorbing the pigments. Once all of the yarn was scoured (which had to be done in two batches – I have so much yarn!), I could then move to mordanting. To mordant fiber means to treat it with a substance that allows the molecules of the pigment to attach to the molecules of the fiber. The best known mordants are metal salts, such as aluminum, iron, and copper. Different mordants will effect the end result in different ways: copper gives more yellow tones, iron “saddens” – dulls the color, and aluminum tends to brighten. There are a couple of options with aluminum and probably the most popular is alum, potassium aluminum sulfate. Alum is also usually considered the safest one to use in your kitchen, which is where most of my dyeing activities take place.

Scouring isn’t the most interesting process, but it’s one of the most important.

Once all of that was done, it was time for the fun part: dyeing! I used madder and cochineal for red, saffron for yellow, woad for blue, and woad with an over-dye of cochineal for purple. I started the process on Wednesday evening by soaking the madder overnight in water. Thursday was actually heating the madder, straining, and barely simmering on the stove with the yarn in the dye bath; I repeated this process with the saffron, minus soaking overnight. Later Thursday evening I started the woad vat. Woad and indigo are dyestuffs that need to be used in conjunction with a fermentation vat in order to dye textiles. I think I might do separate write-ups for woad, madder, and saffron each in order to go more in-depth into what I did for each one.

Friday I attempted to dye my warp yarn with the woad vat, but was only able to do one dip; to obtain deeper colors, it’s usually necessary to do multiple dips in the woad vat. After the first dip, the vat went out of balance I think, as the yarn didn’t get any darker after a second dip; meaning, either the vat became not alkaline enough or too much oxygen was incorporated after the initial dip. So I took the vat inside and reinvigorated it for the next day. Saturday was much more successful, and I was able to finish dyeing the warp, the weft, and the supplementary weft. Sunday I slept all day, because pretty much every muscle in my body ached. I stood a lot in front of the stove, watching the temperature of the pots of yarn and dye. I lifted and carried pots heavy with liquid. I squeezed and washed a lot of yarn. And the yarn is not light, either, especially when wet. But, I really do love natural dyeing. I love how nature gives us so many colors if we know how to unlock her secrets.

All of the yarn I will be using to create my chiton. It’s a bit surreal to see it all together, ready to be made into yarn balls and woven.

Winter 2021 – Week 9 Summary

At week nine, I realized that I should probably figure out what I want my chiton to look like. I’ve been so absorbed in spinning the yarn that I forgot that I’d like it to, you know, have color. I had decided a while ago that I’d like it to be predominantly blue with some sort of border. I had been thinking of adding stripes to the top and bottom (and had been considering what that may look like when I was trying to fall asleep, which is never a good time to be thinking about schoolwork). I finally sat down and drew sketches of two possible variations and decided on which one I like best. As much as I love purple, I went with red to go with yellow, even though purple and yellow would have been complementary.

I would usually go with the blue, yellow and purple combo, but for whatever reason I find the blue, yellow, and red combo much more pleasing. Now I have to decide if I want to add any designs while weaving…

I then had to decide what I wanted to use to create these colors. Woad was a very attractive option, but very hard to find. Luckily, a friend of mine a while back sent me a UK source for woad powder. For red, I had been planning to use cochineal that I have on had, but then I thought, “Gloria, you should pick something you’ve never used before to make your life even harder.” So I chose madder. Madder is a very historical dye that can give multiple colors depending on how you treat the dye bath, the fiber, etc. I purchased from Maiwa in Canada, as I know they ethically source their goods. For the yellow, I decided to be ridiculous and use saffron. Yes, saffron is terribly expensive, but the yellow stripe I’m planning to weave in is small so I figured that I could get away with using such an expensive dyestuff. For the saffron, I ordered from Mountain Rose Herbs, as they too are committed to ethically sourcing the myriad of products they sell.

After deciding what dyestuffs I wanted to use, I then had to calculate not only the approximate weight of the yarn to be dyed blue, red, and yellow but also the amounts of each dyestuff I would need to dye the yarn. It was a lot of math. A LOT. But I really enjoy math, so it was a nice change of pace. I may have gone overboard to make sure my estimates were as accurate as possible by taking the average weight and yardage of each of the skeins I’ve spun so far to figure out how much the yarn allotted for each color would weigh, in both grams and ounces. What can I say, I like accuracy.

Winter 2021 – Week 8 Summary

I read a lot this week. I finished up Greek and Roman Dress From A to Z by Liza Cleland, Glenys Davies, and Lloyd Llewellyn-Jones and found Cleland’s dissertation online to read as well. The title is Color in Ancient Greek Clothing, which was able to tell me more about what would have been used as dye. There’s several useful tables on possible and confirmed sources of natural dyestuffs that I found fascinating; I had been considering researching the native flora of Greece to look for anything that could be dyed with – but someone else did it for me! Dyestuffs that had definitely been used for dye and had a word for it in ancient Greek were specified. Most, like madder and kermes weren’t surprising, but I learned a couple of new ones such as turnsole, Chrozophora tinctoria, and orchil, Roccella tinctoria.

Though I didn’t know it at the time, I finished spinning up the last skein of yarn that I’ll complete for this project. I still haven’t calculated the yardage, but it should be at least 400 yards. That means I spun more than 1700 yards, which is enough for the weft but not the warp. I’ve run out of time to spin yarn and I’ve come to accept this. I’ll have to buy the rest, but the fact that I spun at least the weft yarn myself is pretty amazing to be honest. I’ve learned that this is not easy work. It is not quick work. Making fabric by hand takes time and pain. Spinning for hours every day is exhausting; my legs are constantly treadling and my hands are constantly moving and making repetitive movements. My back would hurt and it was painful to move afterwards. And even after all of those hours of treadling and moving and hunching over my spinning wheel, I still didn’t spin enough for a single garment. The cost of this chiton in labor hours alone is enormous, and though I know most modern yarn and fabric is created with machine, I still wonder how in the world can people buy a dress for thirty dollars?

Winter 2021 – Week 7 Summary

I started to catch up my weekly posts in week seven. My depression has not done me any favors in terms of school work, but I started getting treatment again for it this week (side note: it’s helping!). I realize it may be weird to discussion my mental health issues in my ePortfolio, but I believe it’s relevant to how I approach my work, and I also try to be very open about this subject in order to alleviate the stigma around mental health.

Anyways, I did some more spinning and reading. I got lost down a bit of a rabbit hole in Prehistoric Textiles about weaving patterns and textile motifs possibly being the inspiration for many of the patterns painted on pottery. It did hurt my head a little, but I love that people have actually studied such niche things (the author, Barber, was talking about how the patterns that were perhaps woven onto Minoan textiles were used for decorating the walls of ancient Egyptian tombs). I’m unsure if I’ll weave any patterns onto my chiton – it’s going to be a whole ordeal warping the floor loom, as I’ve never done that before.

This is part of the ceiling in a 12th Dynasty in Asyut, Egypt; it dates to the early 2nd millennium BCE. In the book that this is in, Prehistoric Textiles, the author discussed how the designs in this and other contemporary Egyptian tombs have similar motifs painted on the murals inside, and that these designs can be found in ancient Minoan frescoes. The designs were mostly likely used on textiles as well as murals and pottery.

I also read the majority of Greek and Roman Dress From A To Z. Though, saying I “read” the whole thing is slightly misleading: I skimmed it for any and all words dealing with color and dyeing and took notes on those parts. It was interesting and it led to me to look into the etymology for indikòn, the Greek word for indigo. I wanted to know in what period did indigo started being used in ancient Greece, and I figured that if I could find out the earliest usage of the word indikòn, that might give me a good idea (or at least allow me to make an educated guess). Spoiler: the earliest usage was the first century CE, so the earliest period was probably the Hellenistic period, which is a bit later than the periods I’ve been trying to limit myself to studying. I’m so grateful for having friends who have degrees in Classics – without them I wouldn’t have been able to figure this out on my own.

This is also the week where I started noticing how much by body ached from spinning so much. My legs are constantly treadling my spinning wheel. Even though the treadling isn’t as intensive as being on an exercise bike, over time the repeated use of the same muscles day in and day out takes a toll. Luckily, I can take a break for a few days but I wonder about people in the past who couldn’t take a break, who needed to spin every day otherwise there would be no clothes or linens. I wonder about how much they ached or if they became used to it after a while. Perhaps, as they probably started spinning in childhood, they never ached all that much. I do not know and I wish I had a time machine so I could ask the spinners of the past myself.

This is random, but I wanted to share my notes. Most of the time I take reading is writing these notes. I’ve filled half of my notebook with notes like these. I kind of have to – there’s just so much information.

Winter 2021 – Week 6 Summary

I started this week off by winding my plied yarn onto my niddy noddy. I admit this is my least favorite part of the process. Winding onto a niddy noddy is important not just because it creates a skein – there are other ways of doing that – but using a niddy noddy allows me to make a very good estimate of how many yards of yarn I have. Every wrap around it is about 72 inches; if I count how many times I wound my yarn around the niddy noddy, I can multiply it my 72 and now how many inches I have, then divide by 36 to know the yardage.

I didn’t do this step this week, but I thought I’d share. This is the first step for me in plying yarn: creating a center-pull yarn ball. On the edge of the ball winder is a handle that I turn to wind the yarn single onto the contraption (unfortunately the handle didn’t make it into the photo). The upper platform spins on a tilt, which allows the yarn single to wind on in an even and orderly fashion. When all of the yarn single is wound on, I’ll have the end that I’ll be holding, but I’ll also have the other end sticking out of the center of the ball. By pulling from the center end and unwinding from the outer end, I can ply my yarn onto itself. Just doing this step takes me 45 minutes to an hour.

It’s just…very tedious. This last skein was wrapped around nearly 250 times. And I have to count them. It takes a while, as you can imagine. Winding onto the niddy noddy and counting the yardage took me an hour. It’s necessary, but just so very tedious and not particularly fun. Though, I suppose people would finding spinning tedious or doing all of the math not very fun at all, and I do.

I also read a bit. I’m supposed to write a post/essay on natural dyes (that I’m late with doing, sigh) and I also need to figure out with what I’m going to dye my yarn. I’d like to stick with dyestuffs that were used in the Archaic and Classical periods of Greece, but I’ll also probably use some of what I have on hand; I have an old dye bath of cochineal that I’ve been saving and perhaps I’ll use it for this project (dye baths can be saved and reused until the pigment is exhausted). There was a chapter about dye establishments in the book I checked out via Interlibrary loan, but it focused more how to ascertain if an area was possibly a place where large-scale dyeing took place and didn’t talk about the actual dyes themselves. I also read the chapter on dyes from Prehistoric Textiles, which was a bit more helpful.

Winter 2021 – Week 5 Summary

In week five I did a random assortment of things. I, of course, spun. I finished up another half-bobbin and plied it together. I never paid attention, but after logging my hours I realized it took me six hours to ply. It never seems like it’s that long and for some reason my brain never sees plying as a large endeavor, but it really is. Not only do I have to wind nearly 1,000 yards of yarn into a center-pull ball, I also have to spin the two ends the ball creates together; controlling the tension of each string and keeping a consistent amount of twist for all of it. It’s kind of intense and not nearly as relaxing as just spinning. But, plying makes the yarn stronger, which is important for warp.

I also spoke a bit about my work in a class my sponsor, Dr. Sarah Williams, teaches. I was pleasantly surprised that people found what I’m doing fascinating. I mean, I find it all terribly interesting, but that’s me. The purpose of me speaking was to help inspire her students for their own individual projects and I hope that I did indeed inspire.

I also received my Murex care package! Inside are Murex shells, dried glands, dyed fiber and fabric samples, and some of the pigment itself. I could use it to dye the smallest bit of yarn…but I kind of just want to keep it as a curiosity- how many people have Murex dye? The person who sent it, Mohammed Ghassen Nouira (here is an article about him and his work and here is the Facebook group where he shares his ongoing dye experiments) also sent me extra dyed wool fiber so I can spin it. It’s not a great amount, but it’s enough to create an adequate amount of embroidery floss. I’m not sure what I’ll use it for, but it will be for something very special.

There is a lot going on here. The three shells are Murex shells, You can also see inside the box the fiber and fabric samples. In the front on the left are the dried glands that are the source of the purple dye, and on the right in the glass jar is the smallest amount of the pigment itself.
So many colors! The range of colors are all produced from Murex dye. It all depends on how you process it.

Winter 2021 – Week 4 Summary

I’ve once again fallen behind on my weekly posts. I think living through a pandemic is finally catch up to me and my mental health is taking a hit. It’s hard to focus on school when the world is…well, what it is right now. Nevertheless, I will do my best to get things done in regards to school. It’s also difficult to complete these posts because what I have spent most of my time for the last two weeks doing is spinning. Looking back at my log, for week four I spent over twenty hours spinning and less than seven hours doing non-fiber related things. Of course, I can talk about what I did in those seven hours, but I’m unsure what else I can talk about when it comes to spinning (except for the random trains of thought I have when spinning. Spinning gives you time to think). Or perhaps I’m being very negative right now because of depression.

In week four, I caught up with updating this ePortfolio with my weekly summaries for weeks two and three. I hadn’t realized I had fallen behind; it’s hard for me to keep track of time these days. It was good to get that done. I was also finally able to pick up the library book I requested through Interlibrary Loan! That was exciting.

The book that I jumped through so many hoops to attain: Archéologie des textiles : des origines au Ve siècle : actes du colloque de Lattes, octobre 1999

Hilariously, the chapter I wanted to read wasn’t quite what I thought it was, but it was still utterly interesting to me. The chapter, “Women’s Work: Spinning and Weaving in the Greek Home,” by K. Carr talked about the logistics of how much cloth a family could produce in one year if only the women in the household were doing the work. It also discussed a bit on how women were viewed in Greek society; it was almost as if they were dangerous and liminal creatures who needed to be watched at all times and kept very busy. The ideal of femininity was a woman who was industrious and skilled in spinning and weaving…except that it could be argued that those activities were also “dangerous”. There are at least a couple of instances in Greek mythology and lore where a woven textile was a dangerous weapon, and spinning was associated with the Moirai – the Fates, which suggests that spinning, in some subconscious way, was not seen as just a harmless activity.

This is a painting by John Melhuish Strudwick titled A Golden Thread from 1885. It depicts the Morai – the Fates, a trio of goddesses that determine the length of each person’s life. The figure on the left is Clotho, “the Spinner”, who spins the thread of life; on the right is Lachesis, “the Alloter”, who measures the length of each life; and in the center is Atropos, “She Who Cannot Be Turned”, who cuts each thread, and therefore life, short. There doesn’t seem to be many ancient depictions of them, which makes sense to me. All beings – including the gods themselves – were subject to the Moirai, and that’s just a bit terrifying. Source of photo is Wikipedia

Also, in preparation of starting research into natural dyes that were used in Archaic and Classical Greece, I contacted the owner of a Facebook group who has spent twelve years researching and experimenting with the pigment found in Murex sea snails (though the main species of snails used for dye are no longer categorized in the genus Murex anymore, they are still in the Murex family). The glands of snails in the Murex family are the source of the famous Tyrian, or Phoenician, purple dye used in ancient times, but there is evidence that Murex has been used for purple dye in the Aegean since the time of the Minoans . Anyways, the person sells kits comprised of two or three shells, a dried gland, some small samples of fiber and fabric he’s dyed, and some of the pigment itself. The pigment is expensive – a company, Kremer, sells it for about $2,600 a gram. The person I talked to sells it for about half. I only bought the tiniest of amounts – 0.2 grams – mostly just to have it and share it here! I wasn’t planning to spend much time devoted to Murex purple – I’m more interested in dyes that the average person could obtain – but I also couldn’t pass up actually having samples of the stuff for my very own.

Militello, Pietro. 2007. “Textile Production and Minoan Palaces.” In Ancient Textiles: Production, Craft, and Society : Proceedings of the First International Conference on Ancient Textiles, Held at Lund, Sweden, and Copenhagen, Denmark, an March 19-23, 2003, edited by Carole Gillis and Marie-Louise B. Nosch. Ancient Textiles 1. Oxbow Books.
“Hexaplex Trunculus (Linnaeus, 1758).” n.d. Accessed February 16, 2021. https://www.gbif.org/species/4366460.

Winter 2021 – Week 3 Summary

This week I…did more spinning! I also finished an essay of sorts that I started last quarter about what, exactly, is a chiton. I keep mentioning it and that I’m making one, but I haven’t actually explained what it is. Better late than never, though, right? There was a lot of information to go through, though. Turns out, if you’re an archaeologist/scholar studying the clothing of an ancient people, it’s very very difficult to definitively say anything about the subject as all of their clothing decomposed centuries ago. All we have to go on is visual and literary evidence, and the problem with visual evidence is that we don’t know how closely sculpture and vase paintings resembled contemporary life. That isn’t to say we cant say anything definitively, just that it is complicated subject. Even the meaning of words become confusing. In one of my books, the author stated that the word amorgos probably meant silk. Another author says that a similar word, amorginon, means very fine linen. And, in another book it states it could mean both. I realized that if I pursued researching the words for fabrics I would quickly go down a rabbit hole and lose several hours, if not days, trying to make sense of it all.

Also, I have a rant. The British Museum states that the figure on the right is wearing a chiton. That, my friend, is not a chiton. A chiton does not have an overfold, the apoptygma. That is a feature of a peplos. Not all peploi have an overfold, but if a garment has an overfold, it’s a peplos. Do you know how many images the British Museum states have chitones portrayed in them and they’re actually peploi? Let me tell you: a lot.

I also got my Teeswater wool! I bought 28 ounces of roving and I am slightly overwhelmed with the amount I have to spin in the next few weeks, I must admit. I guess it’s a good thing I enjoy spinning. It was also nice timing that I was able to wind up my plied yarn onto the niddy noddy the night before my wool was delivered. Two skeins finished! They total almost 1,000 yards. Now just 3,200 to go. I…should probably go spin now.

This is a niddy noddy. By winding my yarn on it, I can create a skein and also estimate fairly well how much yardage I have by counting how many times I wrapped my yarn around it.

Winter 2021 – Week 2 Summary

Week two had a little bit everything in it, though it was still mostly spinning. I started by updating this website – besides the obvious change in color scheme, I added photos to the image gallery, added categories and reorganized my posts to easier differentiate between fall quarter and winter quarter. I also played around with the Map widget, though I’m not sure I did it correctly? I mean, I know I added locations that can be seen on the “Map” page, but I think it would be nice to see individual maps on posts that I mark locations. But, I seem to only be able to mark one location for single posts, which isn’t what I want, and I don’t have the energy to figure out how to make it work at the moment.

I also had to do some thinking about my wool situation. In my sleep-deprived state last quarter, it did not occur to me that while the loom I’ll be using may be 36 inches wide, that is not how wide the weaving area is. It finally occurred to me to check and the widest textile I can weave is 28 inches, which isn’t nearly wide enough. I’ve decided to weave four panels of fabric, sewing two together to make the front and the two to make the back. To minimize yarn waste I’ll weave two panels on one warp, but I still had to recalculate how much yarn I have to spin. Luckily, it isn’t too much of an increase: I now need about 4,200 yards instead of 3,800 yards. It’s about an extra skein of yarn.

That is still a lot of yarn though, and I had planned on buying different roving. It took me a bit of time to find something that would still work for what I wanted – a wool that wasn’t too coarse and would be okay to lay next to the skin, white so I could dye it, and ready more or less for me to spin – while still trying to be as ethical and sustainable as possible. I decided to look for a conservation sheep breed. I remembered that there’s something called the Shave ‘Em To Save ‘Em program by the Livestock Conservancy that connects fiber artists with farms and shepherds that raise endangered breeds of sheep; many times the fleece of these sheep will just be composted, but there are many people (like me) who are willing to pay money for the wool and support the people who care for these animals. In this way we can hopefully save the sheep breeds from extinction.

I looked through the Fleece and Fiber Sourcebook for what sheep breed I might want to look for and I decided on Teeswater. One of the things I love about my current wool is how lustrous it is, which is because one of the sheep’s parents is a Blue Face Leicester (BFL for short). BFL are known for lustrous springy locks, but they aren’t endangered. Other breeds that are related to BFL are endangered, but their wool tends to have a higher micron count. This doesn’t always translate to coarseness, but I’ve never worked with any of their wool, so I don’t actually know what they feel like. Teeswater also has a higher micron count that normally wouldn’t be considered next-to-skin soft, but I’ve worked with Teeswater before and it tends to have a silkiness to it regardless. It’s also terribly lustrous.

Between looking though the Livestock Conservancy’s directory and inputting, “SE2SE” into the Etsy search engine, I found a farm near Portland, OR, called Lawrence Cottage (link to Etsy store here). The owner, Staci, raises both Teeswater and Gotland sheep and did a lot of work with the American Teeswater Sheep Association to get the sheep breed listed as critically endangered with the Livestock Conservancy. Lawrence Cottage also has an Instagram, where pictures of Staci’s adorable and obviously happy sheep can be found. Teeswater are a longwool breed (they have been in Britain since the first century CE when Romans brought an ancestor sheep over) and their long lustrous curls are hard to miss.

Finally, I started plying another bobbin of yarn. I’ve learned that my ball winder, which I use to make a center-pull ball with which I ply, can only hold about 3-4 ounces of fiber and with how fine I’m spinning, that ends up being about half of one of my bobbins. So when I say I’m plying a bobbin of yarn, I mean half a bobbin. Plying seems like it should be easier, but for whatever reason, it isn’t for me. I have to concentrate more about what I’m doing, I suppose. I have to hold both ends of the yarn with equal tension, otherwise the yarn will come out uneven. I believe there are times when you would ply unevenly on purpose if you’re making an art yarn…but I’ve never been interested in making that kind of yarn. I’m the type who wants to see how finely I can spin and how perfect can I make my yarn. I’m not a perfectionist…not at all!

Plying from a center pull ball. A center pull ball is a ball of yarn where instead of unrolling your ball for more yarn, you pull from the center. It keeps it from rolling around and is overall easier to work with. It’s also a great way to ply if you don’t have enough bobbins.