The end of Week 7 and the beginning of Week 8 were especially tough mental health-wise for me. Anxieties and stress were keeping me awake at night, leading to sleepy and unmotivated days of work. I was also visiting home for the beginning half of Week 8 which made me decide that maybe this was a good time to go back to my notes from the rest of the quarter and compile them into one big Week 8 post. I had (and was still acquiring!) notes from different films I had watched on natural dyes, along with notes from my book resources as well. This week highlights these gatherings and learnings.


Natural Dyes of Antiquity

A dye of any kind is created through the use of a chromophore or chromogen, which is a chemical compound that brings out color. In order for this color to stick, it must be caught tightly in the fiber, meaning that it is resistant to washing or fading from light exposure. Dyes can either bind to the surface of the fiber with the aid of a mordant (alum, iron, copper, and tin are common historical mordants) or the dye can be trapped within the fiber, which happens due to oxidation-reduction reactions and does not require the aid of a mordant. A good example of a dye that gets trapped as opposed to bonded would be indigo.
Ancient Reds

The most common chromophore used to create the reds of antiquity was the anthraquinone chromophore and its hydroxy derivatives, which may also be known as alizarin. This chromophore is the most stable and resistant to fading from light exposure and was most commonly derived from parasitic insects or the roots of plants in the Rubiaceae or madder family. More specifically, the dye would be harvested from the eggs of female Kermes vermilio insects or from cochineal insects. The harvest seasons for the eggs would occur whenever the eggs displayed the highest content of dye. Anthraquinone red dyes were considered a luxury good and were commonly imported, as well as locally found.
Another commonly used red dye of antiquity was the bark from redwoods. This dye was not as stable as the anthraquinone chromophore, but it was much more affordable for the public. It could also be used as a paint, as well as in cosmetics.
A final red dye of antiquity was the flavytium/anthocyanin red. These colorants are water-soluble and responsible for the red and blue colors of certain fruits and flowers. They were commonly used in illustration and paintings as a watercolor because of their range of colors between red and blue, but with only natural flavylium dyes, this range is limited to yellow and red. A commonly known flavylium red dye could be found in dragon’s blood resin, which can be extracted from trees of the Liliaceae family. Not only does dragon’s blood contain red chromophores, but it also contains additional flavonoids and steroids that make it suitable for medical, along with artistic, purposes. One medical use for dragon’s blood resin was in traditional Chinese medicine.
Ancient Blues

Indigo blue is one of the oldest and well-known dyes of history. It is very light-stable which explains its popularity and longevity as a colorant. In ancient times, indigo was highly prized for its quality, but this made it very expensive to transport and access. Indigo is a vat dye, meaning one or more carbonyl groups are present within the dye. This also means a mordant is unnecessary for fixing the dye to the fiber.
Another blue dye of antiquity is anthocyanin blue, which can be extracted from cornflower. However, this blue is tricky to capture because of the complexity of its structure. Also, once the color is captured, it will only be stable in concentrated solutions. If diluted, it will rapidly lose its color.
Ancient Purple
The color purple throughout history has been a symbol of high status and royalty. Across different cultures and religions, the color was used to mark status; Persian monarchs even made purple the official color of royalty in the 9th century BC. Purple was also a sacred color, as it was the color of the sacrificial mantle used by Christ.

Tyrian purple, the first true purple, was always the most expensive dye in the market. It was procured from Mediterranean shellfish, specifically those of the genera, Purpura. The dye was found in secretions from the hypobranchial glands of the gastropod mollusks. Evidence of this work could be found in the piles of shells leftover on beaches around the Mediterranean.
Ancient Yellows
There are so many sources for natural yellow dyes, even in nature today. Yellow dyes, however, are less resistant to fading than a red or blue dye, which means many yellow antique pieces we view today probably look a lot different than how they looked when they were first dyed. Flavonoid yellows, which are commonly used for dyeing, come in two different groups. The first group consists of the chromophores apignen and luteolin, which are found in plants as glycosides. Luteolin is one of the most stable yellows, making it a common choice for dyeing. An example of a plant that luteolin can be found in would be weld.
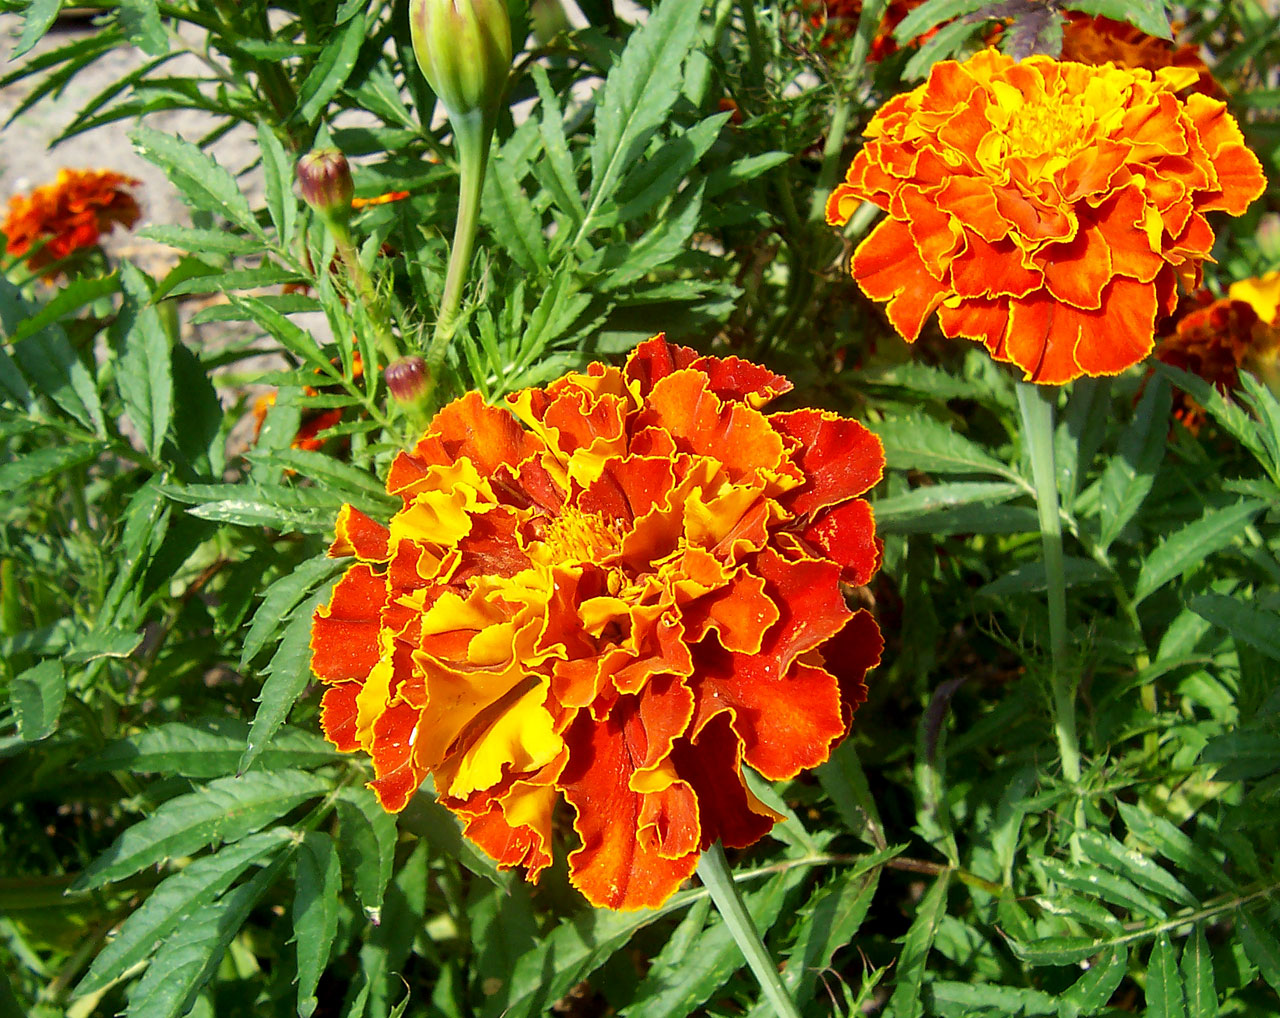
The second group of flavonoid yellows consists of flavonols which contain flavonoids. These flavonoids are well known because of their antioxidant properties, an example being quercetin. Plants within this category of flavonoid yellows include onion skins, dyer’s greenwood and chamomile, marigold, and yellow wood.
Another ancient yellow dye is carotenoid yellow. Carotenoids can be found in many foods we might eat each day, including the red of tomatoes and the orange of carrots. The most popular carotenoid yellow used in ancient times was golden saffron yellow. Two final ancient yellow categories, chalcone and aurone yellows, are similar to carotenoid yellows because of their ability to absorb light at longer wavelengths, resulting in more golden and orange-y hues as opposed to true yellow tones.
Natural Dyeing of Japan
In Search of Forgotten Colours – Sachio Yoshioka and the Art of Natural Dyeing
“The colors you can obtain from plants are so beautiful. This is the one and only reason I do what I do.”
-Sachio Yoshioka
Sachio Yoshioka works with natural dyes in Kyoto, Japan. He has devoted 30 years of his life to the art of natural dyes, hoping to revive forgotten natural dyeing traditions from Japanese culture. In the Yoshioka dye workshop in Kyoto, dyers work with safflower and purple gromwell to create ancient colors used in traditional Buddhist ceremonies, including the Omizutori ceremony that welcomes the start of the spring season. Safflower, which creates a Beni Red, has a particularly complex dye extraction process; it’s a miracle that dyers of the past were able to create such a wonderful color through such an interesting process. Beni Red is used for painting paper that is folded into beautiful flowers for the Omizutori Buddhist ceremony. The Yoshioka workshop has the honor of creating and delivering this hand-dyed paper each year for the festival.
This video was extraordinarily beautiful to me. The imagery of the Yoshioka workshop paired with the beautifully dyed pieces of silk was very welcoming to the eye; the videographer really knew how to draw in their audience with the right shots. The lack of speaking within the video also brought around a certain calm that created a peaceful mindset while watching. The one spoken quote by Yoshioka, himself, also stood out because of the otherwise speechless movie, highlighting the quote’s significance and power. Finally, I loved the glimpse into traditional Japanese culture shared within this video. The imagery of the Buddhist ceremony was incredible to witness and changed the natural dyes from just an enjoyable project to a tradition full of culture and wonder. Yoshioka’s dedication to traditional natural dyeing techniques is beautiful and inspiring. His passion is wonderful to behold.
“Successful dyeing requires intimate understanding of the effects of temperature and dye concentration. How the thread or cloth is dipped is also very important.”
Natural Dyeing of Peru
Made In Peru | Natural Dye
“We work to live, not live to work.”
This video highlighted the work of Ricardo Galmed, an economist at the National Agrarian University in Peru who also operates a dye house with two other dyers. After conducting studies surrounding their use of cotton, they found that there was no point in using synthetic dyes, especially since Peru is so rich in natural dyes to use. The three main natural dyes that Galmed works with in his studio are cochineal for red, indigo for blue, and peppercorn tree berries for yellow. Through using these three primary colors, Galmed is able to create a whole rainbow of naturally dyed cotton articles.
I loved seeing the contrast between Peruvian and Japanese attitudes around natural dyes. In Japan, there was a lot of culture and tradition surrounding the art of natural dyeing, while this Peruvian story was just the side project of a university economist. I think this video really highlighted the fact that a person doesn’t have to dedicate their entire life to natural dyeing in order to partake in it and create beautiful pieces through it. While the passion and dedication of Yoshioka in Japan was highly inspiring and wonderful to witness, Galmed shows that this practice is able to be done by almost anyone, while still celebrating the specific qualities that separate countries and locations bring to this art style. Galmed prompted viewers to make their own textiles and natural dyes through everyone’s individual traditions, which was a beautiful message to share. Despite this difference, I still found this video to be equally beautiful in its imagery and making, and I liked the visual similarities between the workshops and dyeing processes in both Japan and Peru.
A final note about this video is that it was a video produced by a clothing brand, Alternative. I wanted to note this because of the bias that may be present and resulting in the differences I have noted between Peruvian and Japanese natural dyeing. This story was shared in a much briefer fashion; I wish there had been more to see to get a fuller picture of the similarities and differences between these two cultures.
Natural Dyeing of Australia
Captured by Color: Introduction to Natural Dyes
In Bedfordale, Australia, Trudi Pollard works to create beautiful pieces of art using natural dyes from her kitchen and also grown on her own property. She emphasizes the importance of not letting food go to waste, sharing how onion skins, used tea bags, even the stalks of broccoli can be used to naturally dye a variety of different fibers. Pollard shares her personal tips and tricks for dyeing, including her method for determining if dyes are the desired color and also how different pots (stainless steel vs. copper) can help produce different dyed results. Pollard also shares a variety of different dyeing methods within this video. The first method is called sun or solar dyeing, where the fiber is placed in a jar with the dye bath and dye material and left out in the sun for a few days or weeks until the desired color is obtained. The next method is the use of any rusted materials, such as nails, horse shoes, and gears. These items are laid out on the fiber, dampened with water and lemon juice and sprinkled with salt before getting wrapped in plastic and left to soak in the sun. The results of this method are particularly beautiful, but the safety of using rust in a dyeing project is not addressed at all. Finally, Pollard discusses eco printing, which is very similar to the bundle dyeing method.

Overall, this video was really beautiful and fun to watch. Getting to hear these tips and methods from a professional natural dyer was really cool and inspiring. Pollard’s final pieces are also exceptionally beautiful, unlike any naturally dyed pieces I have encountered elsewhere in this project. Pollard makes naturally dyeing a more accessible project for everyone, laying out a variety of different methods that are fairly simple for anyone to try at home. Her emphasis on not letting food go to waste and on using plants grown naturally on her property is also a beautiful lesson. I am now inspired to try a variety of different dyeing methods, especially the solar dyeing and eco printing methods.
Chemistry of Natural Dyeing
The Chemistry of Natural Dyes – Bytesize Science
This video features the Textile Arts Center in Brooklyn, New York. It shares some of the basic chemistry behind natural dyeing through the use of red cabbage, a substantive dye, and cochineal, an adjective dye. Substantive dyes contain the anthocyanin pigment which is water soluble. This makes it so that the dye is able to attach to the fiber on its own, without the aid of a fixative, or mordant. Adjective dyes, on the other hand, do require a mordant to fully bond to the fiber.
Another area of dyeing information that this video shared was on the use of modifiers, specifically related to substantive dyes like red cabbage. The pH of the anthocyanin pigment directly relates to what color the dye will produce. The red cabbage dye on its own produces a wonderful purple color, but when the pH decreased, becoming more acidic through the use of lemon juice, the dye became redder. In the opposite direction, when the pH became more basic through the use of baking soda, the dye turned a more blue-ish green color.
I really appreciated this video and its ability to lay out the complicated chemistry behind natural dyes in a simple, easy-to-understand way. While the chemistry illustrated in this video was very basic, I still found it very informative and helpful for the purposes of this project, and a lot easier to decipher than the writing in my natural dyes textbook. The demonstrations in the video were also helpful and accessible to anyone interested in this process, as the dyer shared many different options of natural dye materials, highlighting items that can probably be found within your kitchen right now. Finally, this video cleared up some other questions I’ve had about the dyeing process, specifically questions surrounding why fibers must be pre-wetted before dyeing, and also why a pH neutral soap is important to use when washing a final dyed piece.
Dyeing with Indigo
Indigo – From Fresh Leaves to Powder
“I like to be a part of the process.”
This video shared the process of working with the indigo plant to extract a beautiful indigo pigment for dyeing. It focused on the fermentation method for dye extraction, which uses the summer’s heat to ferment indigo plants in a vat of water. After a few days when the vat starts to get smelly, the plant material can be removed and lime (for increasing pH) plus oxygen can be added in order for the indigo pigment to sink to the bottom of the container. Once the pigment has fully separated from the water, the water can be carefully scooped out, leaving the sludge of pigment at the bottom. The dye can be used in its paste form, or it can be dried out in the sun to form a powder. The powdered indigo will store a lot longer than the paste will. This fermentation extraction process will create a darker blue than other indigo extraction processes; a truly beautiful ocean color.
While I did not work with indigo during this project, my mom recently purchased a few indigo plants that I am excited to experiment with in the future. The color created by indigo is exceptional, and I think the process explained in this video is really interesting and worth testing out. I like the idea of working with powdered natural dyes, instead of just creating a dye bath with plant material. I also especially liked this video because of the above quote, “I like to be a part of the process.” This quote referred to the hand grinding of the dried indigo paste to create the dye powder, which I thought was a beautiful connection to the creation of the pigment. Natural dyeing creates such a special connection between the fiber and the dyer, knowing your hands played a role in creating the beauty of the piece. I feel deep connections with each of the pieces I have dyed, and I think this quote highlights the specialness of this connection.
Dyeing with Mushrooms and Lichens
Natural Yarn Dyeing with Mushrooms and Lichen
I was really interested in using mushrooms and lichens as natural dyes, so this video was especially exciting to me. It went over dye extraction processes for the dyer’s polypore mushroom (phaeolus schweinitzii) and the rock tripe lichen (umbilicaria). For the dyer’s polypore, the process includes dehydration and grinding of the mushrooms into a fine powder, which can then be used as a dye when added to water. The dyer’s polypore creates a wonderful mustard yellow color, perfect for yarn or other fiber projects. For the lichen, ammonia will be used to extract the dye. This extraction process can take up to 6 months, but produces a lovely magenta color when used as a dye.
While I did not end up using any mushrooms or lichens within this project, this video left me inspired to experiment with these natural dyes in the future. The peacefulness of this video was relaxing; there was only soft music with video visuals and captions instead of speaking. I found these dye extraction processes especially interesting as well; I am inspired now to test out different extraction processes apart from just creating simple dye baths.
Sheep to Shawl – May 22nd

I had the wonderful opportunity on May 22nd to attend the Sheep to Shawl event hosted by the Twisted Strait Fibers group. Twisted Strait Fibers is a cooperative of fiber artists located in the Pacific Northwest area. They work to share excitement and knowledge on fiber arts, supporting one another instead of remaining distant in their fiber endeavors. Each month, TFS hosts a zoom meeting for the community to come together, and in May, this meeting was an educational event on the process of taking a piece of fiber from the animal all the way to a sellable piece. It featured Susan Kroll of Thistlehill Farm in Sequim, WA, who discussed the subjects of shearing day, skirting fleeces, washing fleeces, storing and handling fleeces, and finally dyeing.
While this event didn’t necessarily teach me anything I didn’t already know about natural dyeing or working with fleece in general, it was wonderful to come together with a group of experienced fiber artists and hear their journeys and advice. Kroll also shared photos of yarn she had naturally dyed herself, and the final colors were quite astounding and beautiful. It made me excited to work more with my family’s own sheep and fleeces, taking a fleece all the way from the animal to a spun and dyed ball of yarn myself.
Shoe Update!

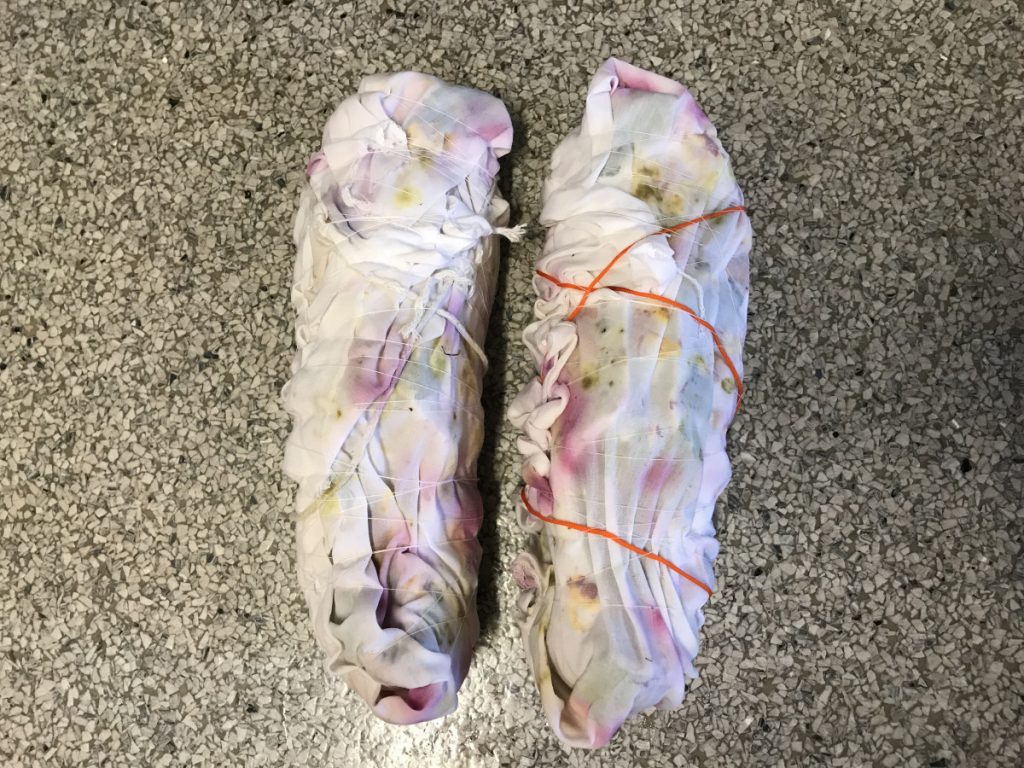
The reveal! Honestly, this was not at all what I was expecting, but it was still super exciting nonetheless. It doesn’t seem like the rhododendron or the madrona bark made much of a mark, but the dried marigold made the most vivid dark spots with golden outlines. Some of the other colors I’m not even sure which material created!


Because I was hoping to get a wider variety of color during this process, I decided to do a second round of bundle dyeing with the shoes. I thought it couldn’t hurt to try again, and I still had time within the quarter to carry it out. So I went back out to forage for some more fresh materials. This time, I gathered and used a bracken fern, scotch broom flowers, a dandelion, and some pink-tipped daisies. Although I had wanted to only use foraged materials from around campus, I also decided to use some onion skins and avocado peel from the store. Both of these were highly recommended in my natural dye search so I wanted them to show up in my project in some form.
This time around, I also stuffed the shoes with scrunched-up pieces of paper so that the tongues would stay up during the dyeing process. In the above photos, it’s clear that the tongues didn’t get any dye on them, so I wanted to try and fix that this time around. I’m hopeful for more color in this second round of dyeing!