All posts by Aubrey Evelo

Set Up – Week XI and Summer

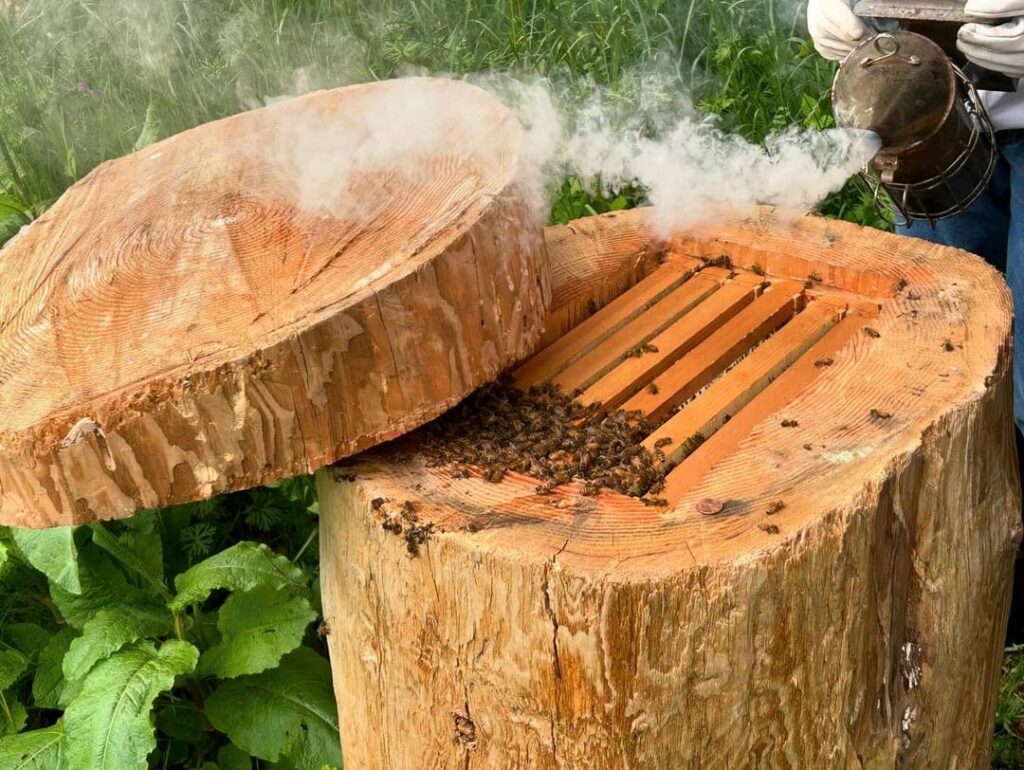
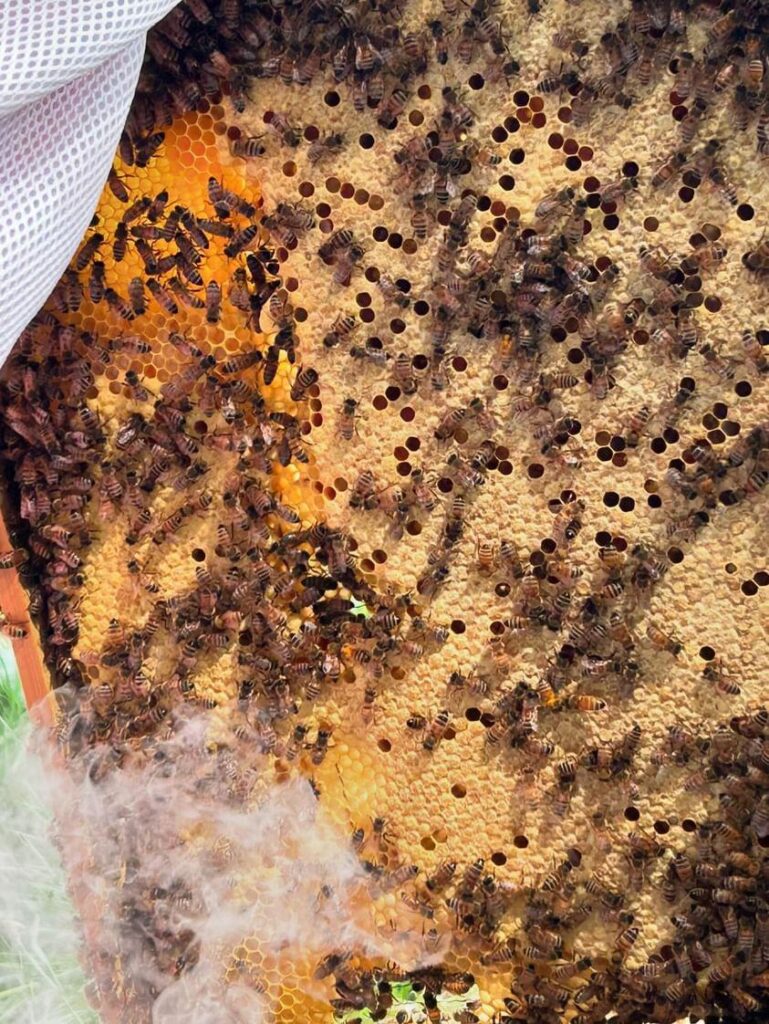
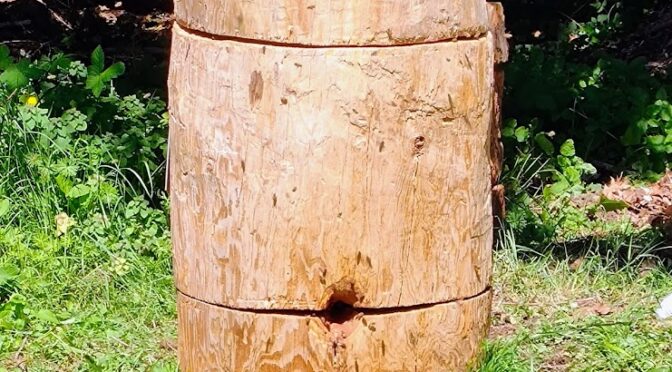
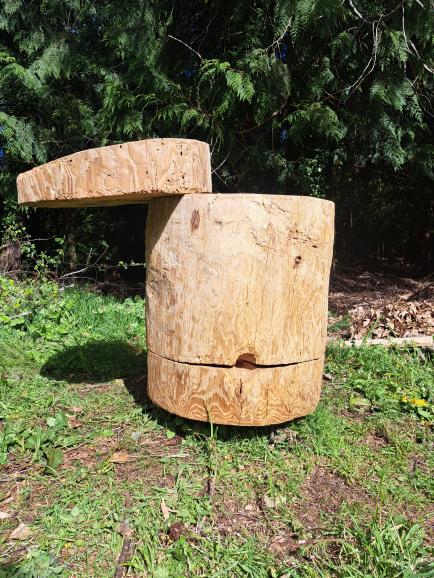
Fifth week after installations

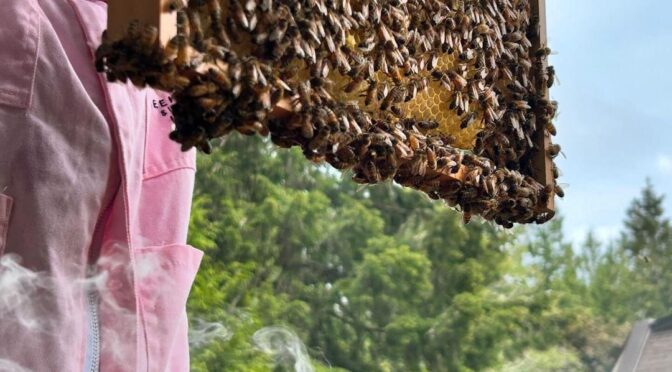
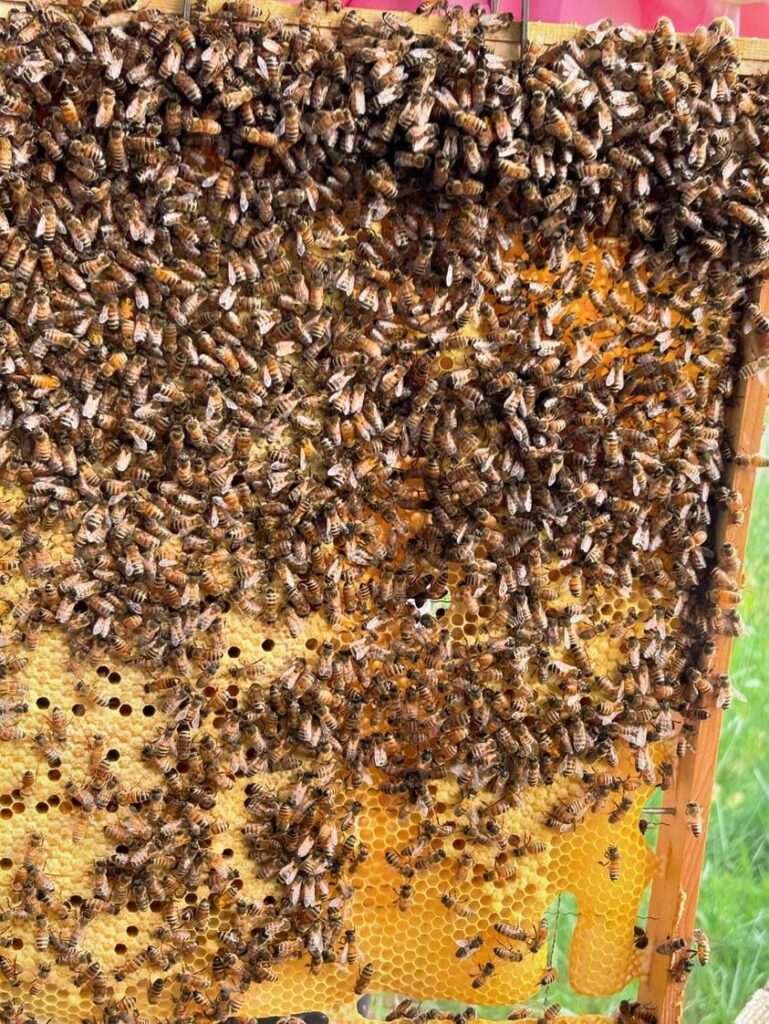
Log Hive Looking Full

The spring quarter has come to an end, but this experiment has not. It is currently my summer break, but I am still keeping an eye on the log hive. I’ve been observing more foraging workers than ever when conditions are warm and dry, but there has been a fair amount of rain this week.

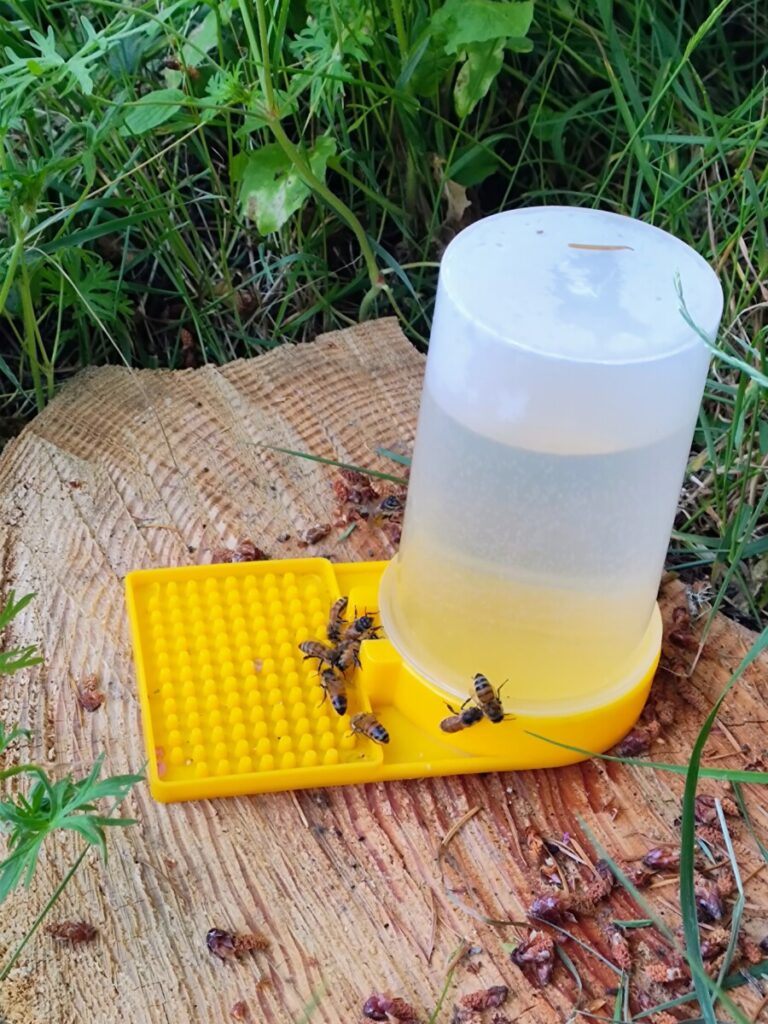
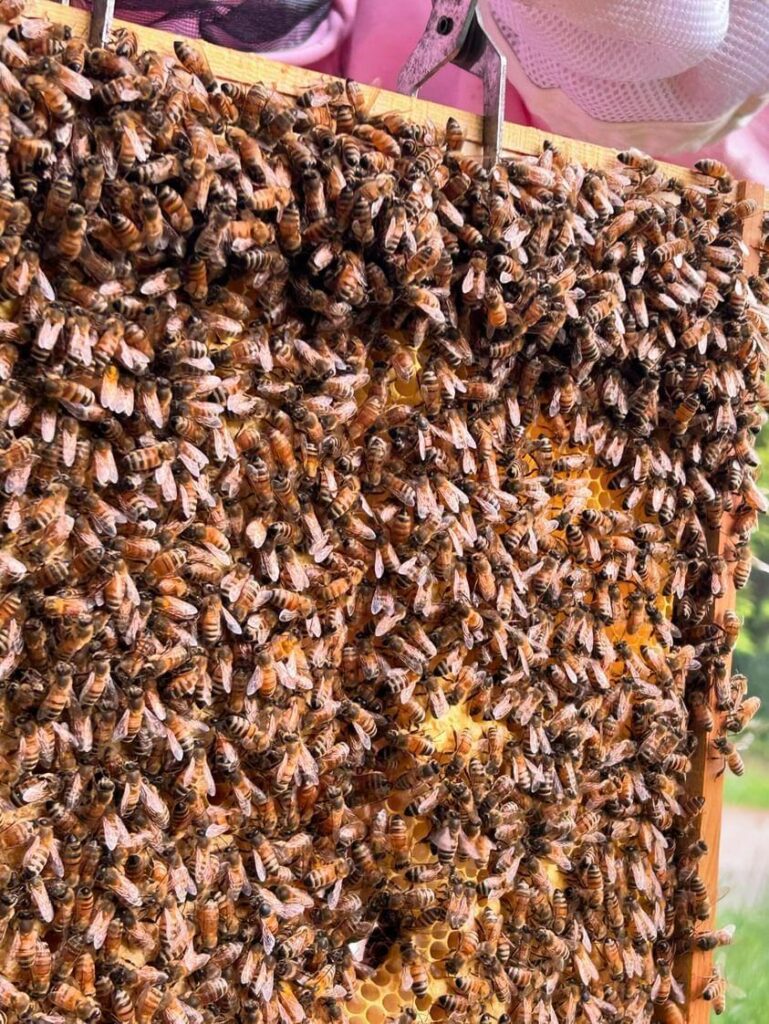
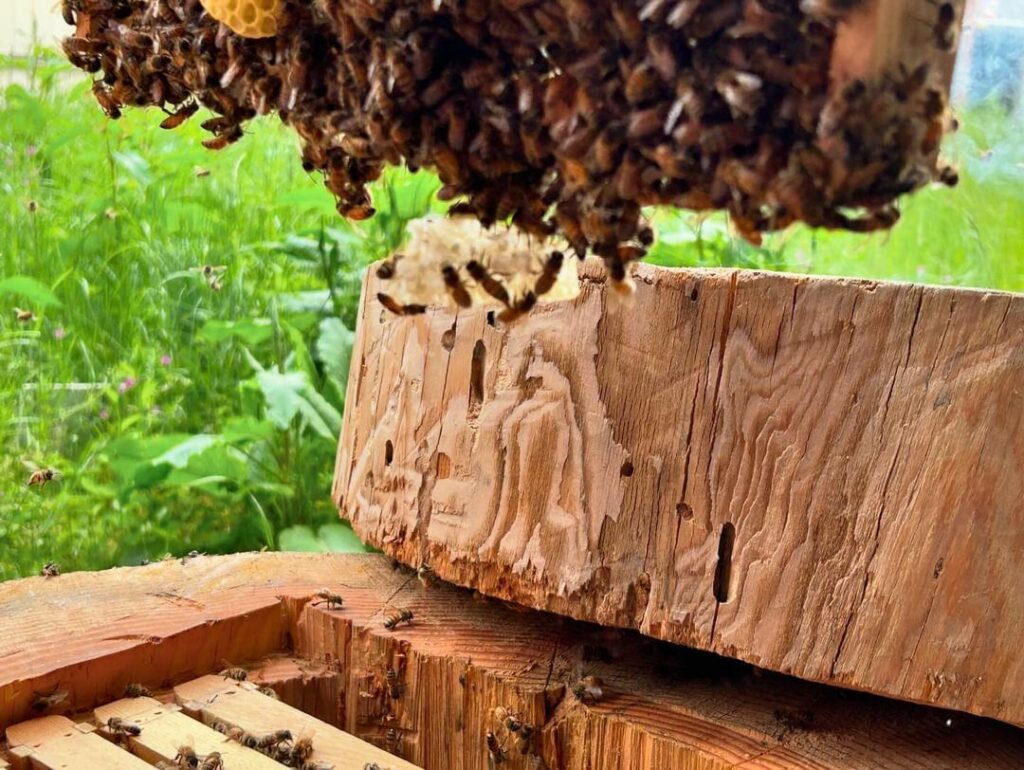
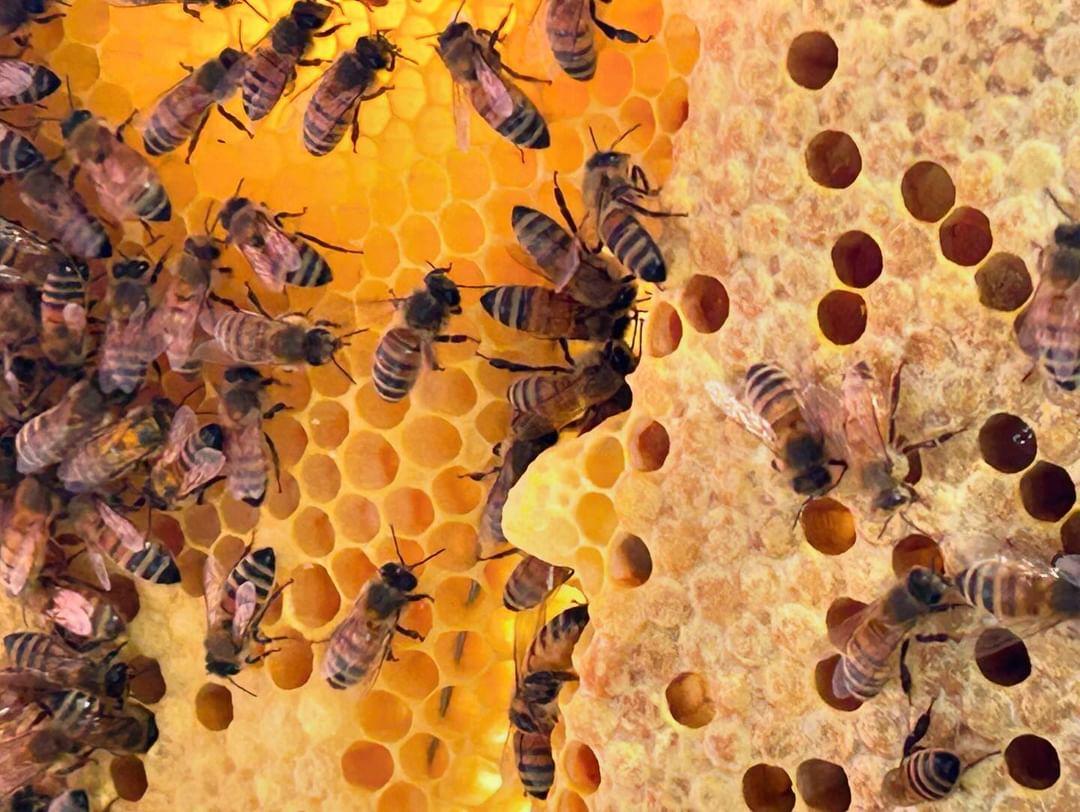
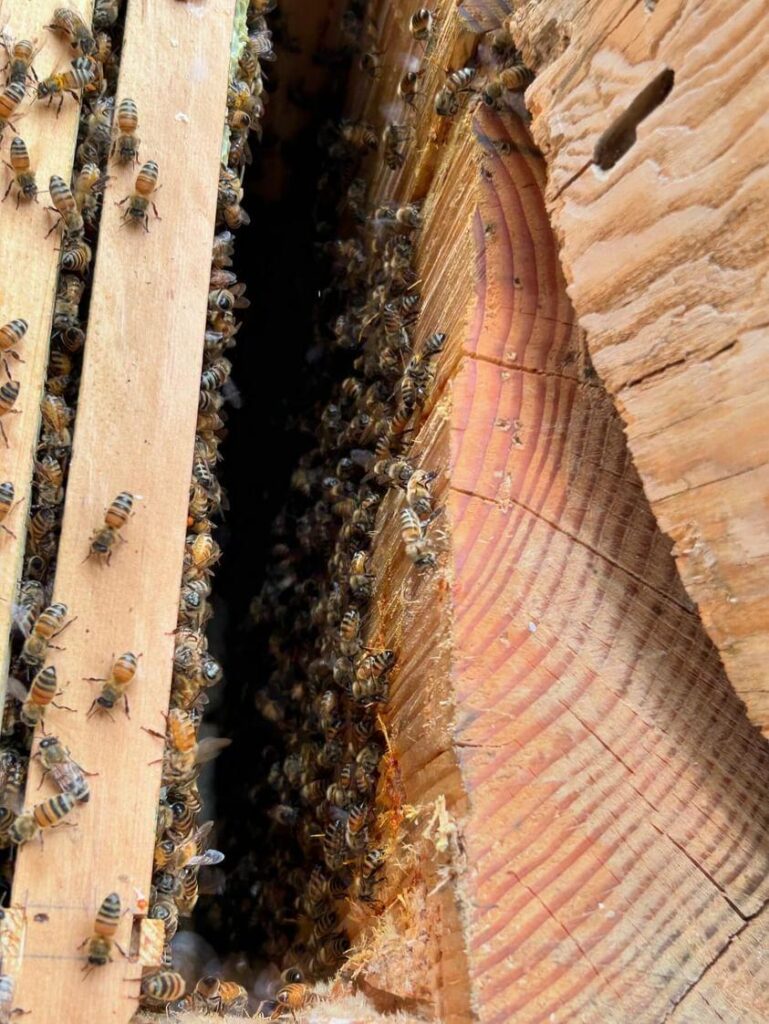
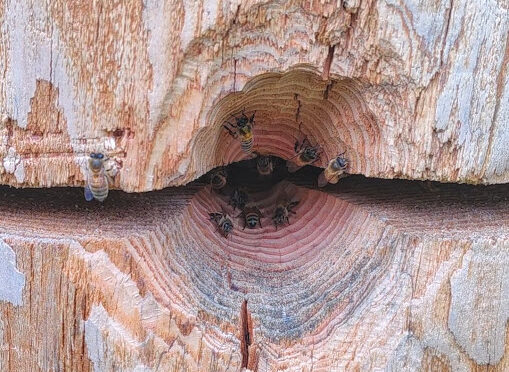
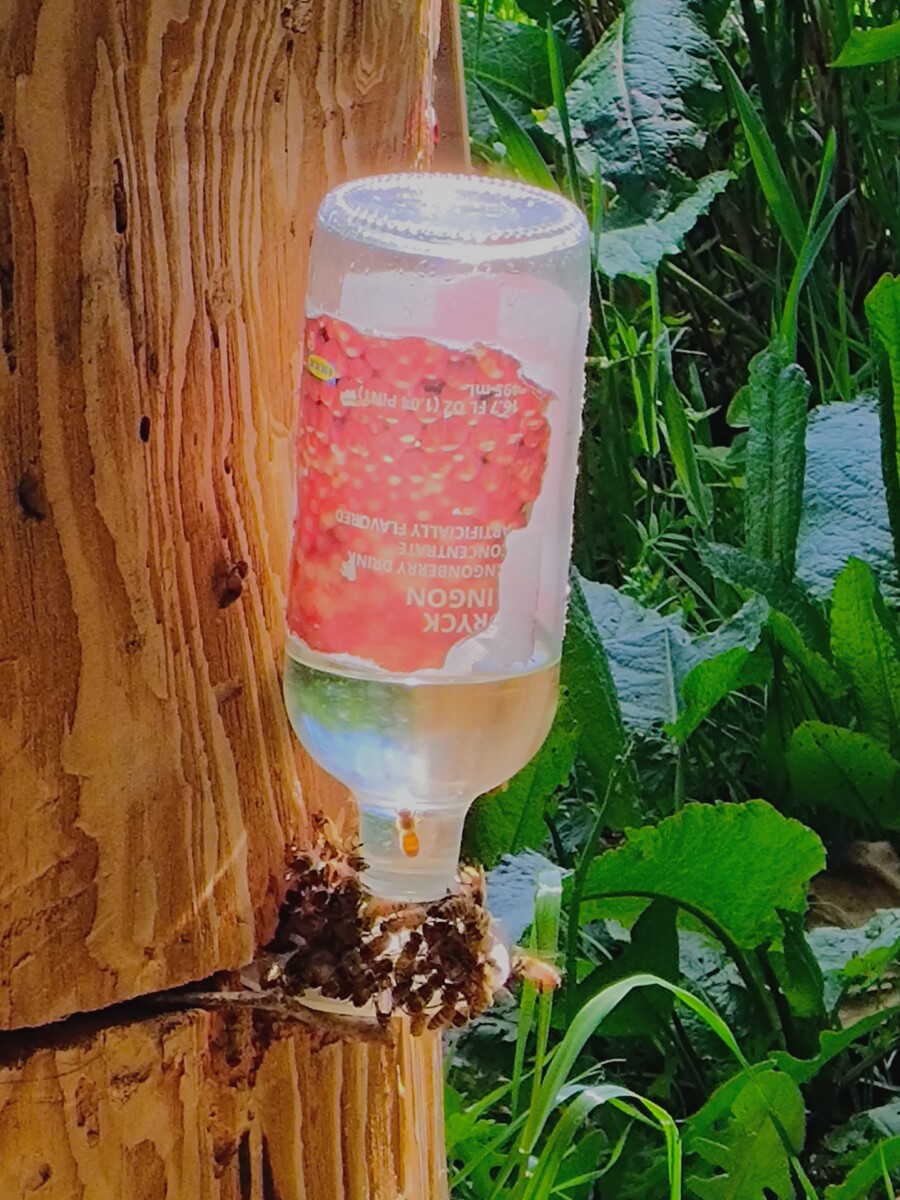
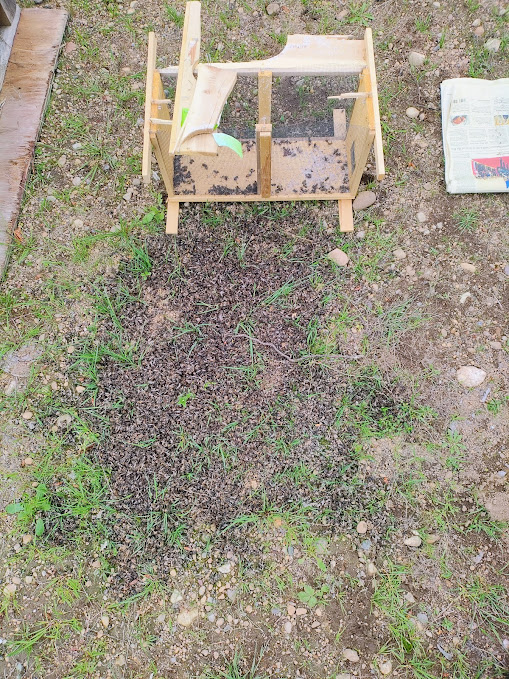
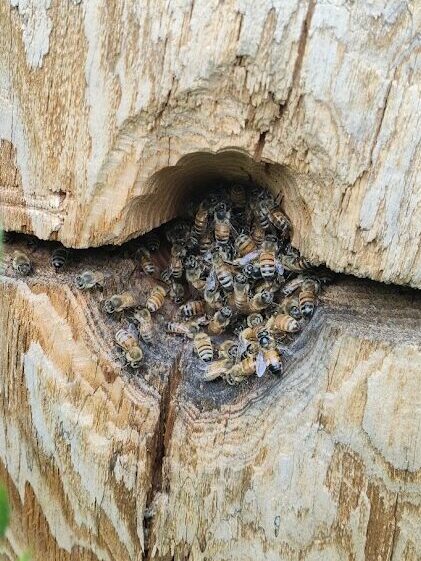
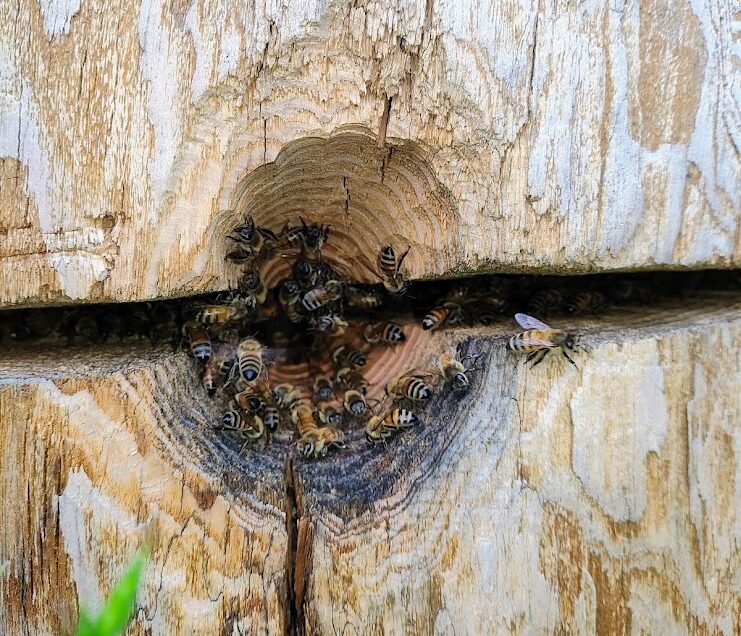
Visiting the hive during showers allows me to make a better estimation of the colony’s population, as nearly all of its drones and foragers should be sheltering from moisture. At these times, I observed tight crowding and festooning in the entrance, as it the hive were overflowing. I even tried poking this clump with a twig, which they gripped onto and stretched out in a chain of bees holding hands with surprising resistance.

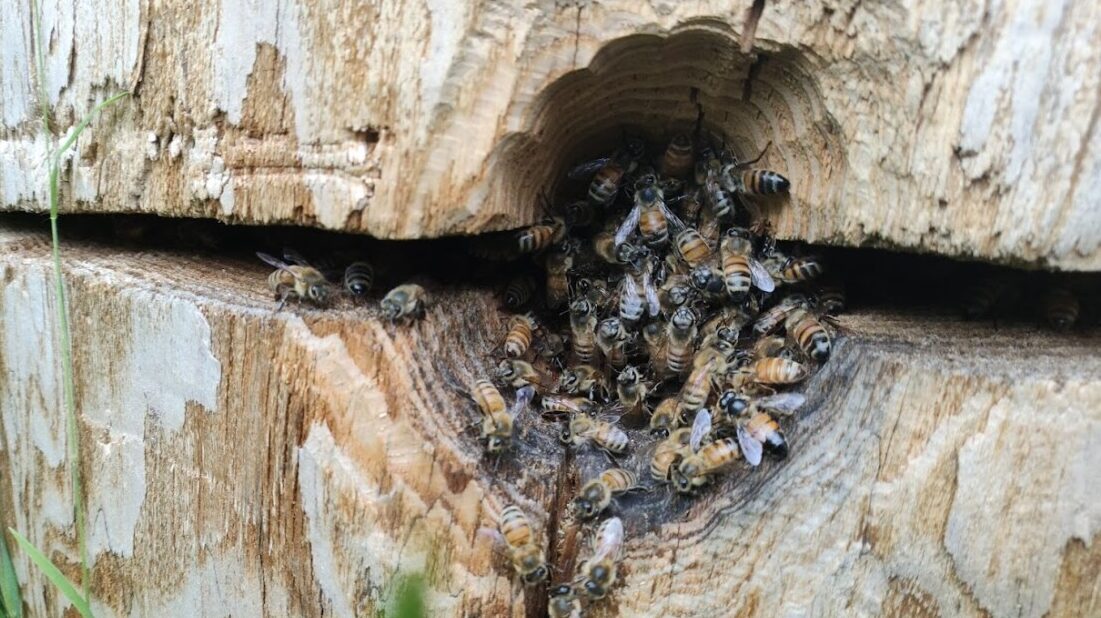
When the rain would stop, the bees began spreading out across the entrance and taking flight, likely to relieve themselves out of the hive (also known as cleansing flights). As the sky cleared, foragers returned to business as usual and leave to return fully burdened with pollen.

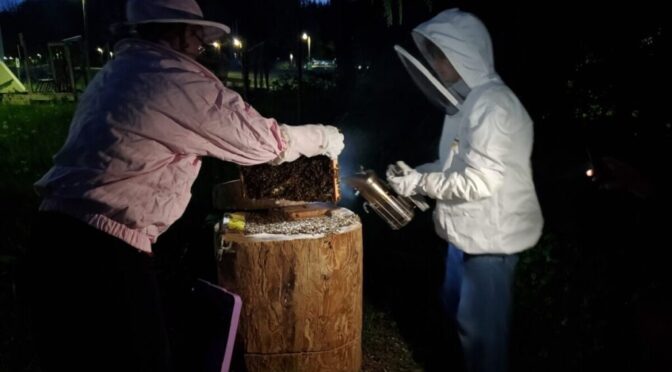
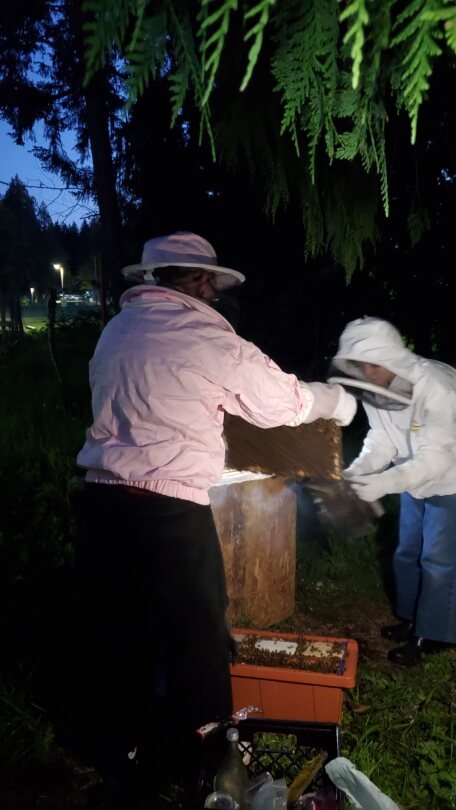
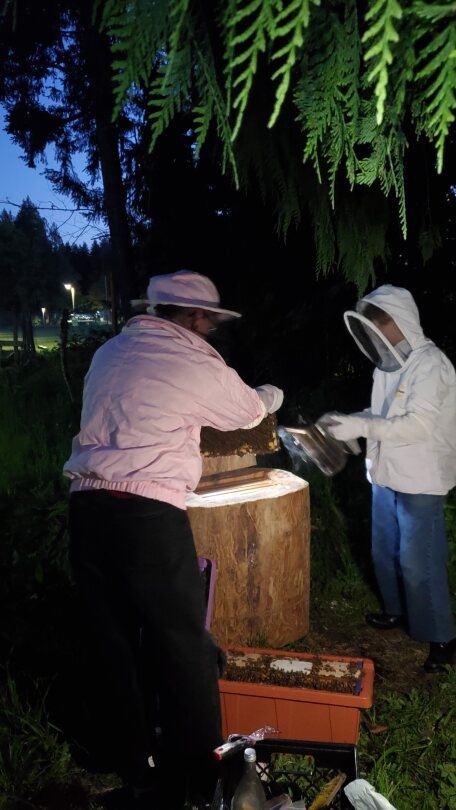
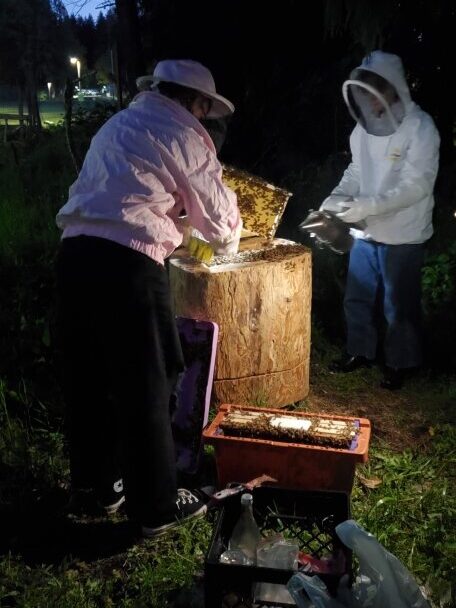
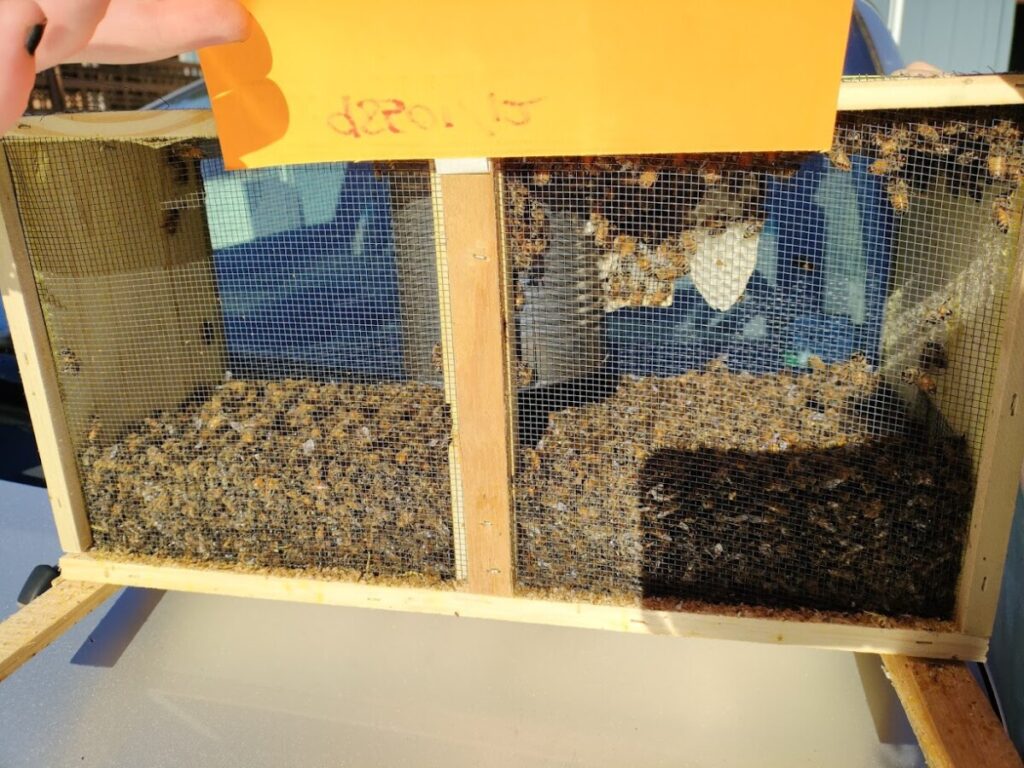
This clumping behavior at the entrance seems to confirm my impression that the colony will be swarming soon in response to reaching the maximum population capacity of the hive cavity. This would be very good news in regard the the log hive colony’s total reproductive capacity. However, in order to properly maintain a record of any daughter colonies, preventative management will be needed to ensure that the swarm does not get loose.

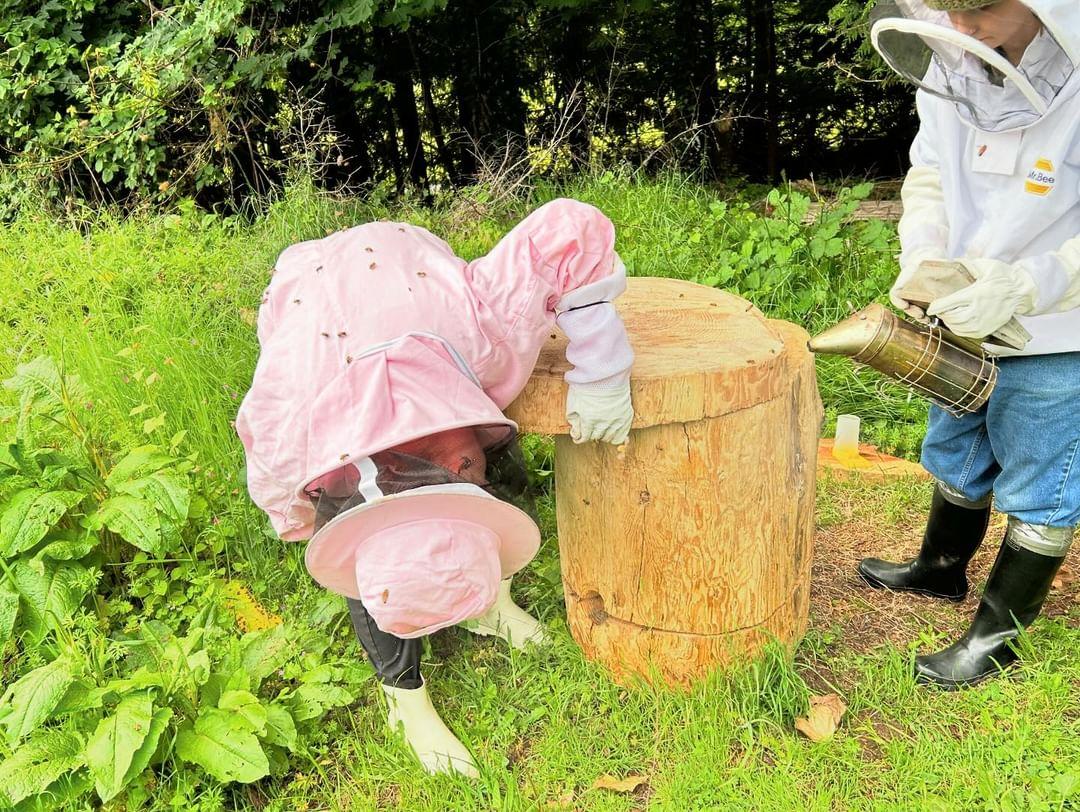
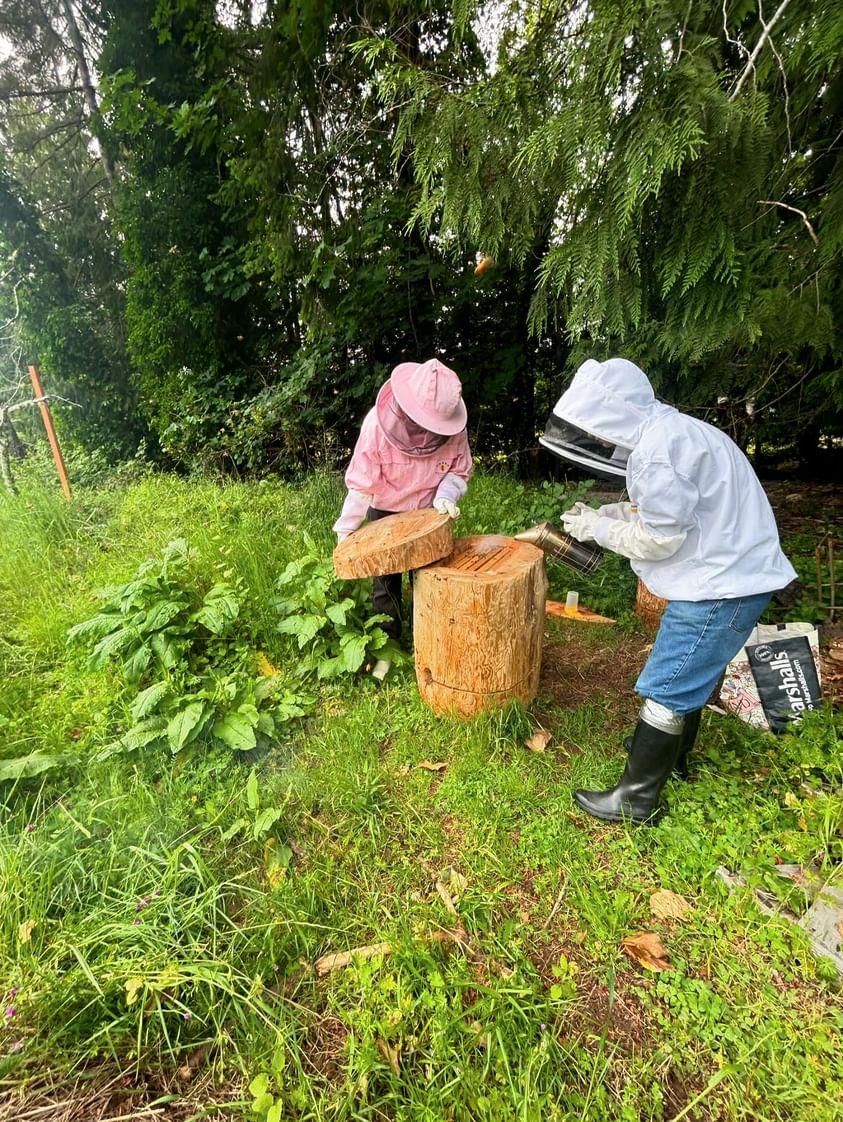
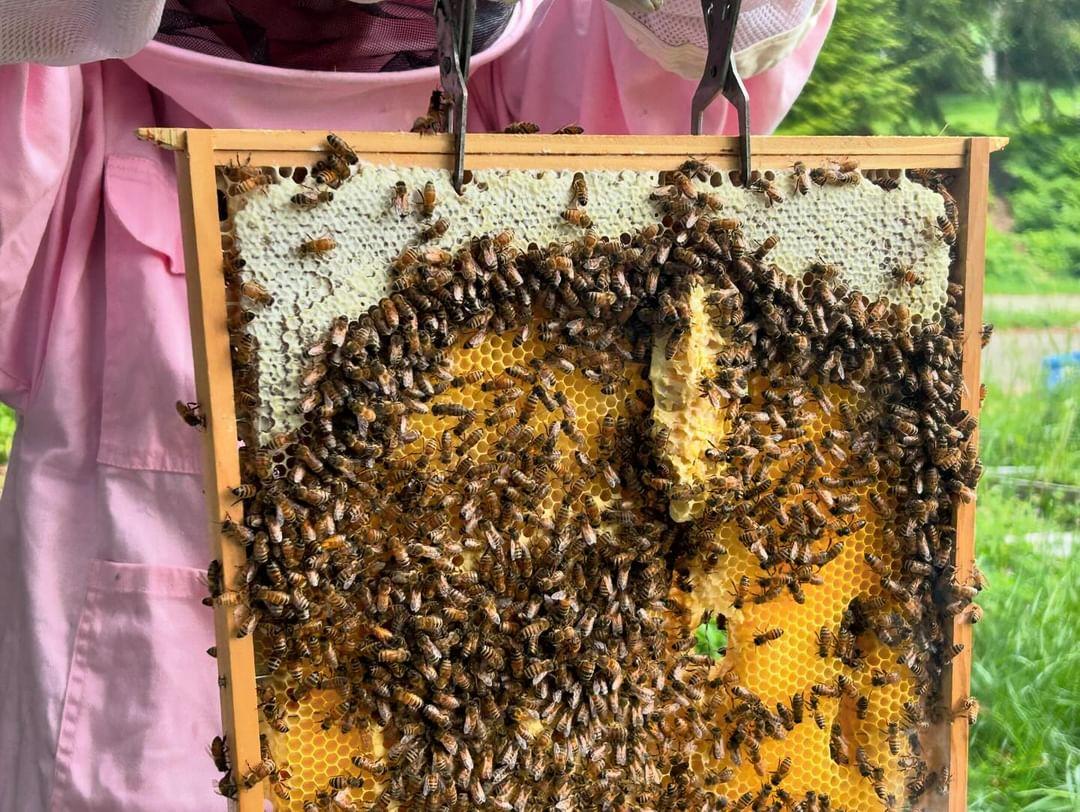
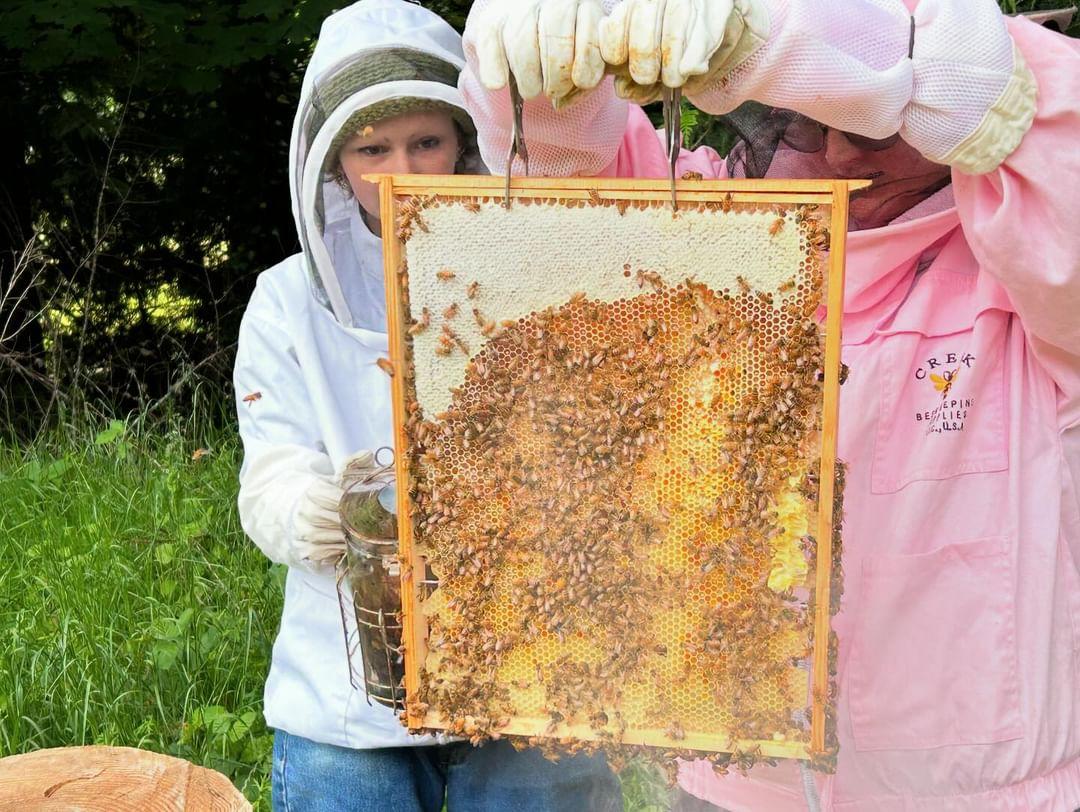
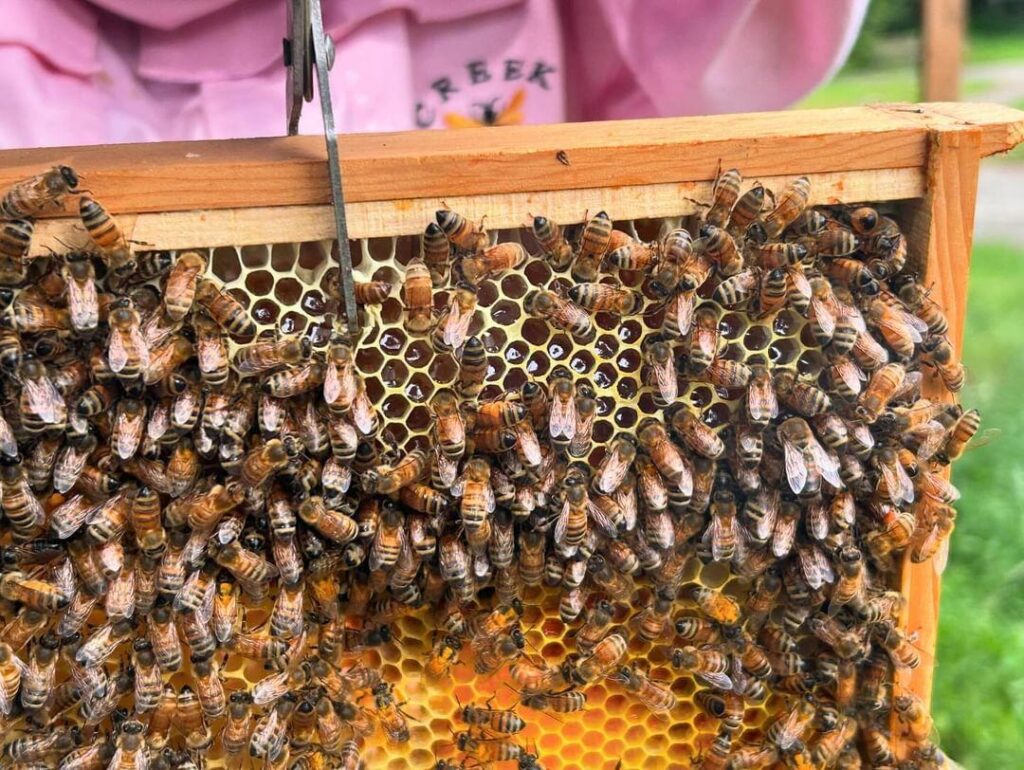
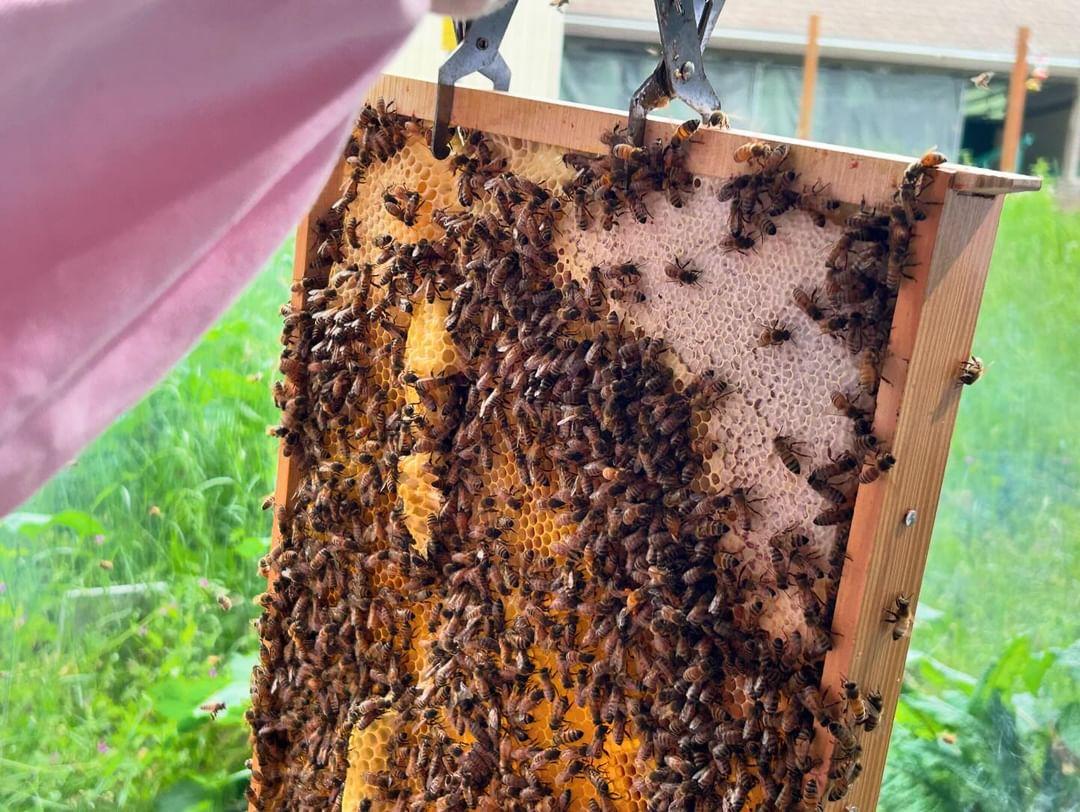
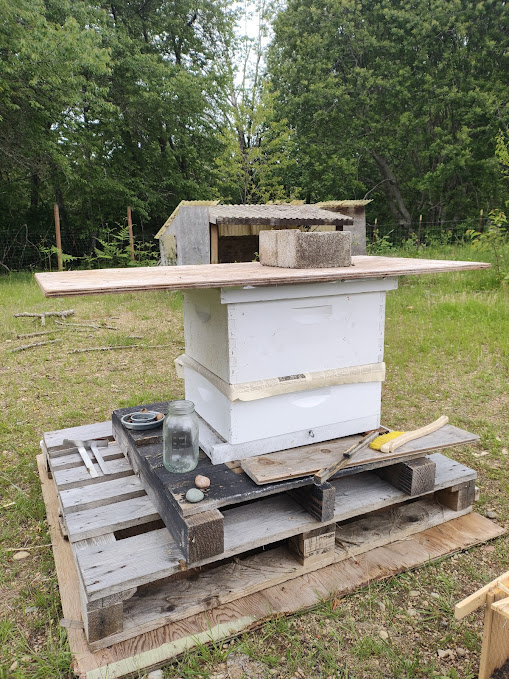
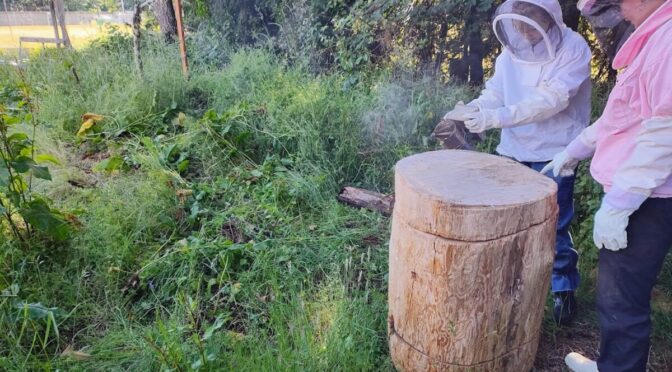
This would mean performing a split, or artificial swarm, by manually relocating a portion of the colony to another hive along with resources and a daughter queen or queen cup containing an adolescent or larval queen. I made plans with my boss Cathy to split the colony into a nuc-hive of hers to relocate to a permanent hive on her property.

Weekly posts will continue into summer in a continuation of my independent learning contract. I am currently creating another eportfolio for next quarter to document more of my progress observing the performance of my honeybee colonies. I will be providing access to this website soon, so please stay tuned for more honeybee updates!

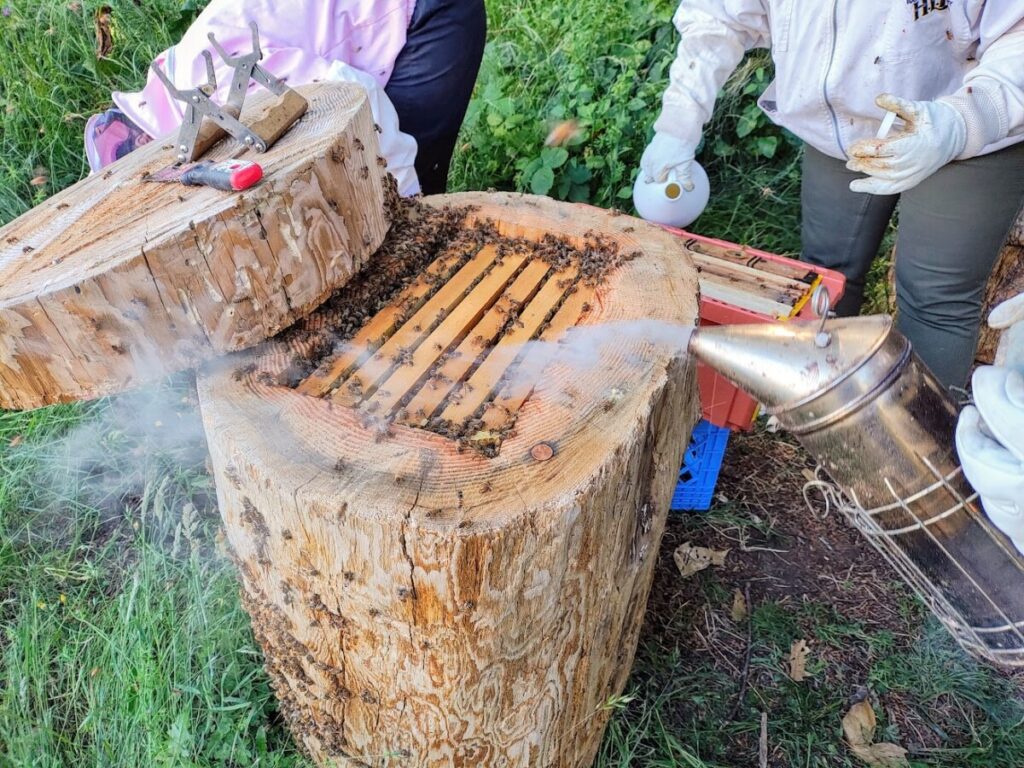
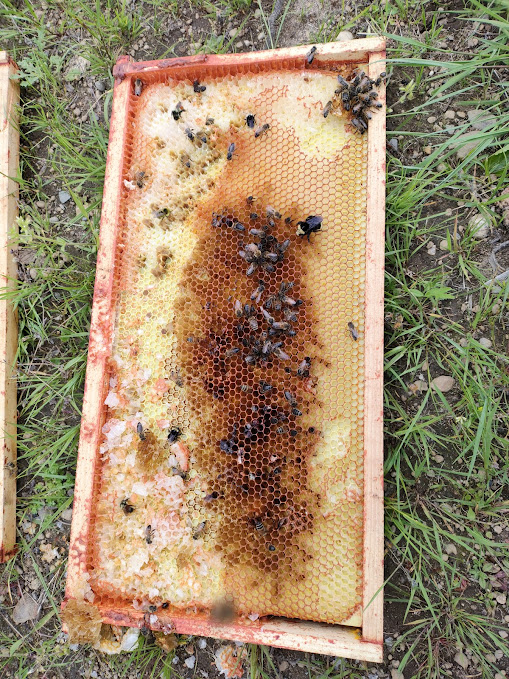
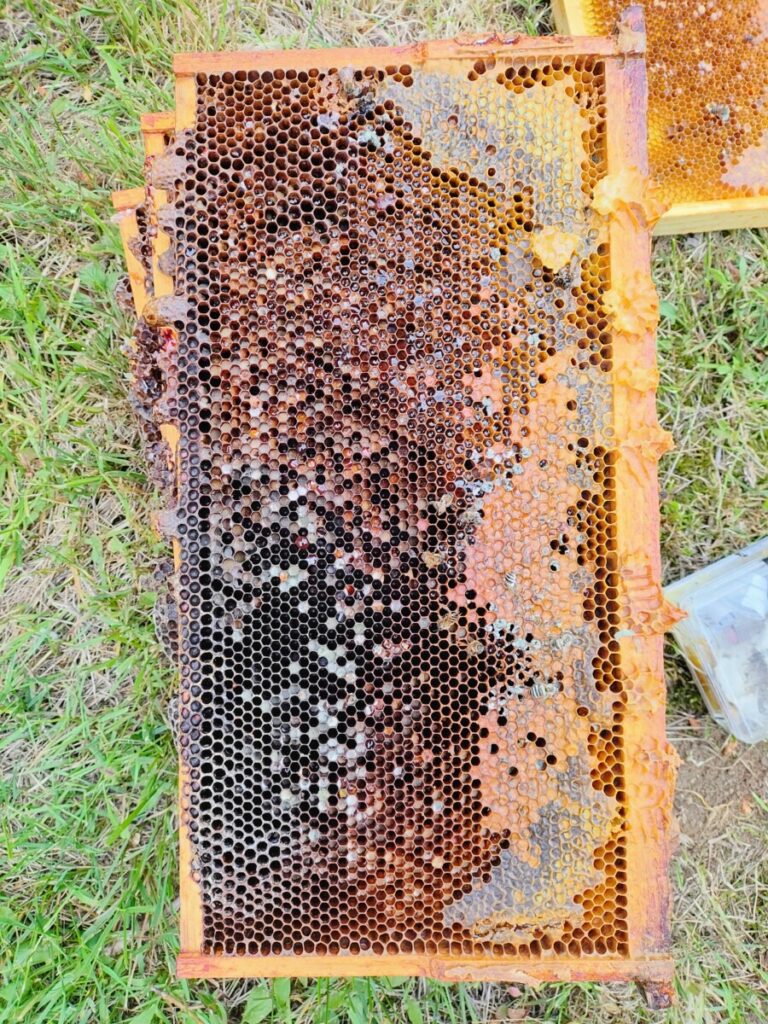
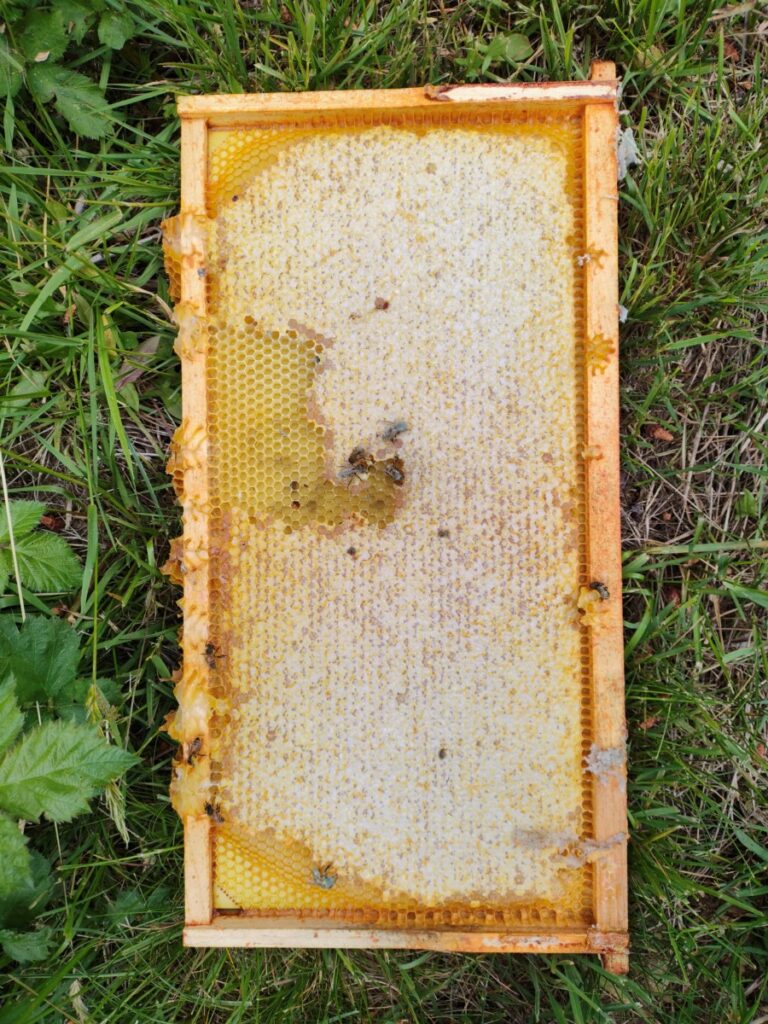
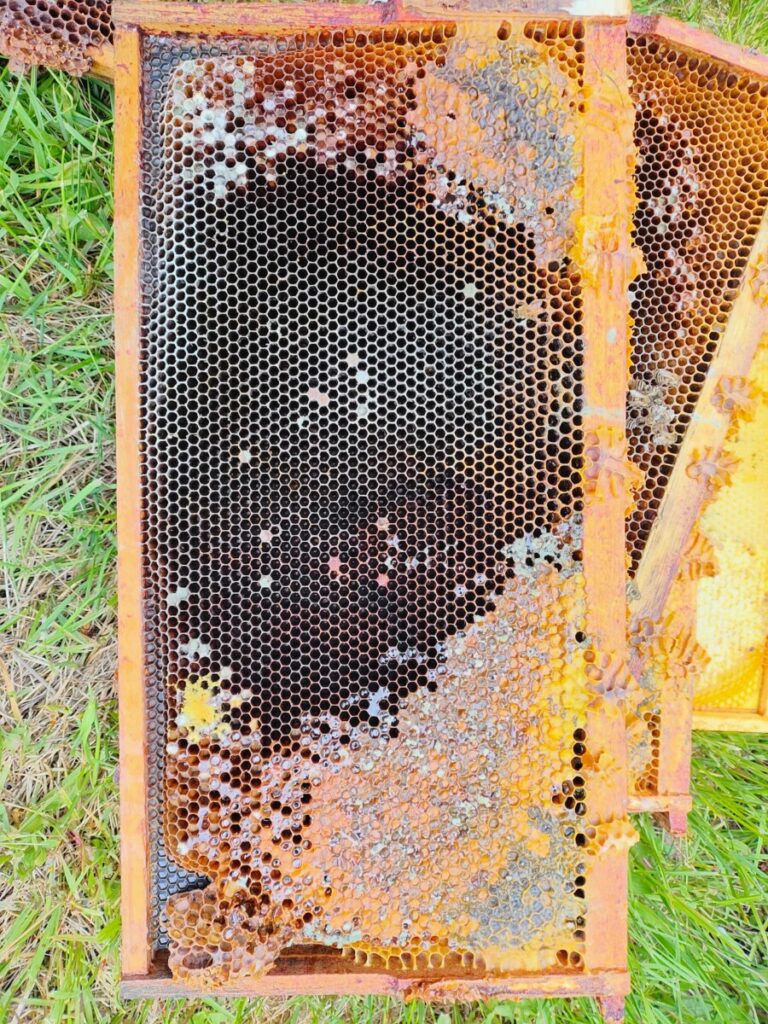
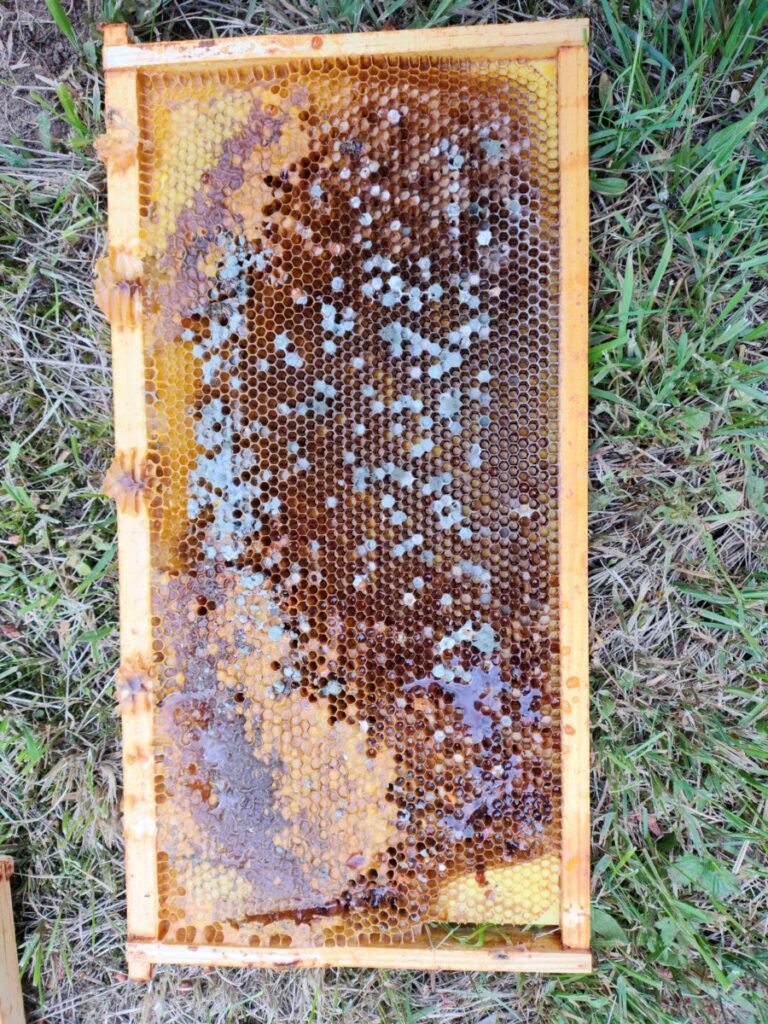
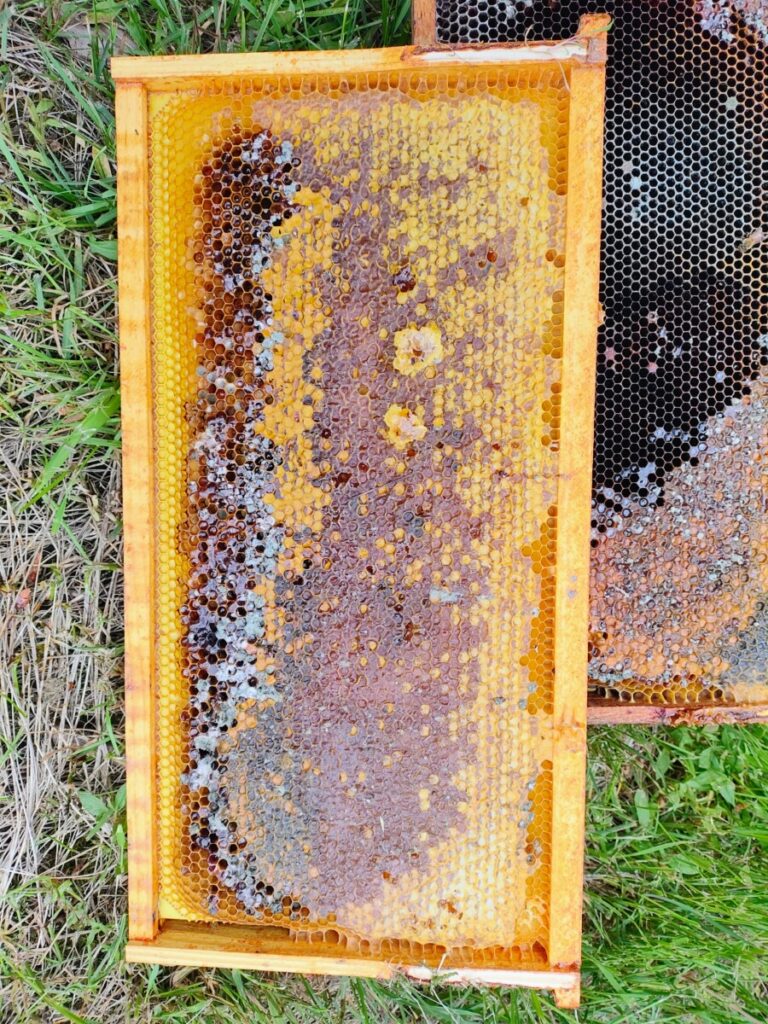
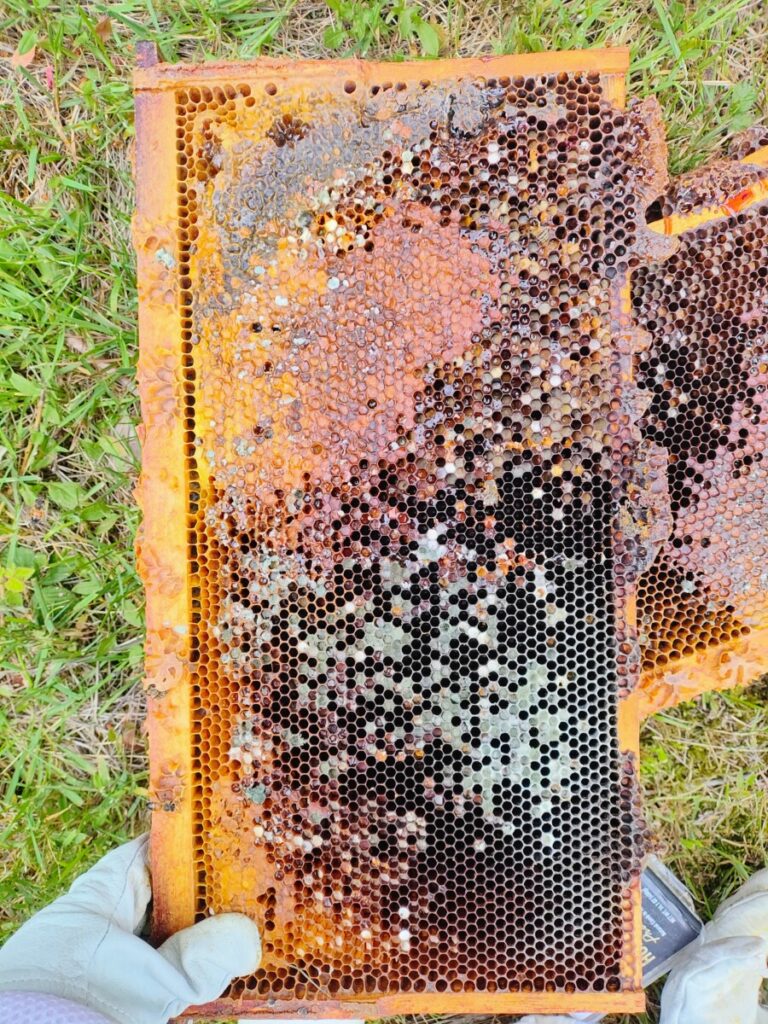
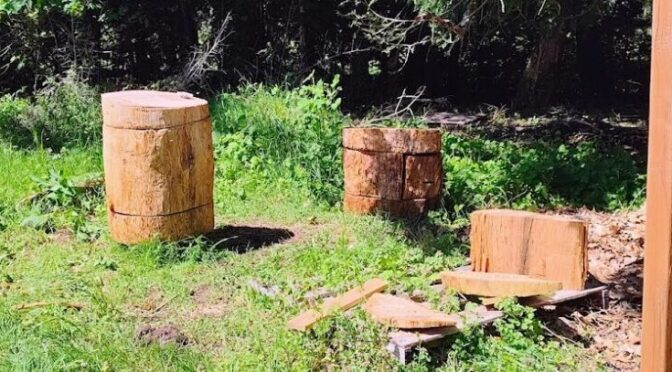
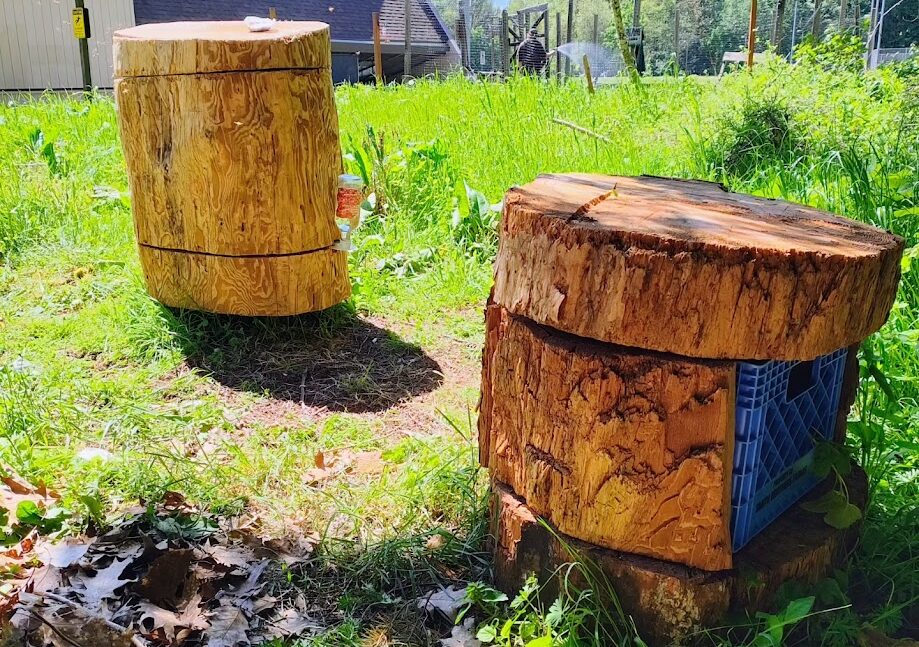
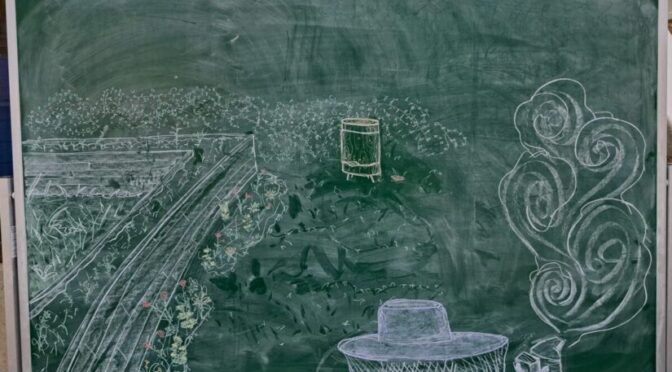
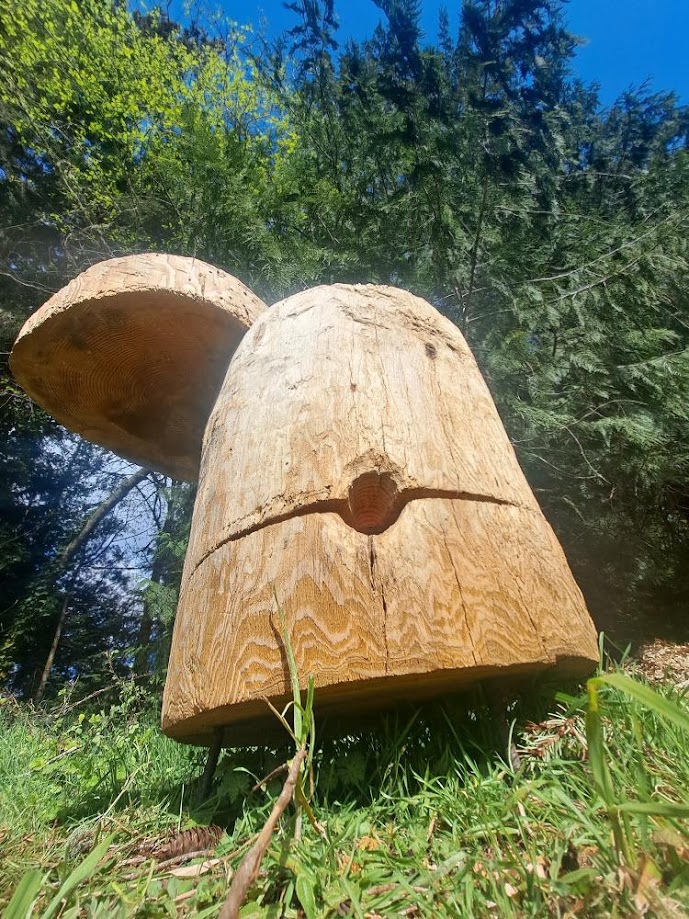
Sneak-peek of Log Hive Inspection #2: Colony Split

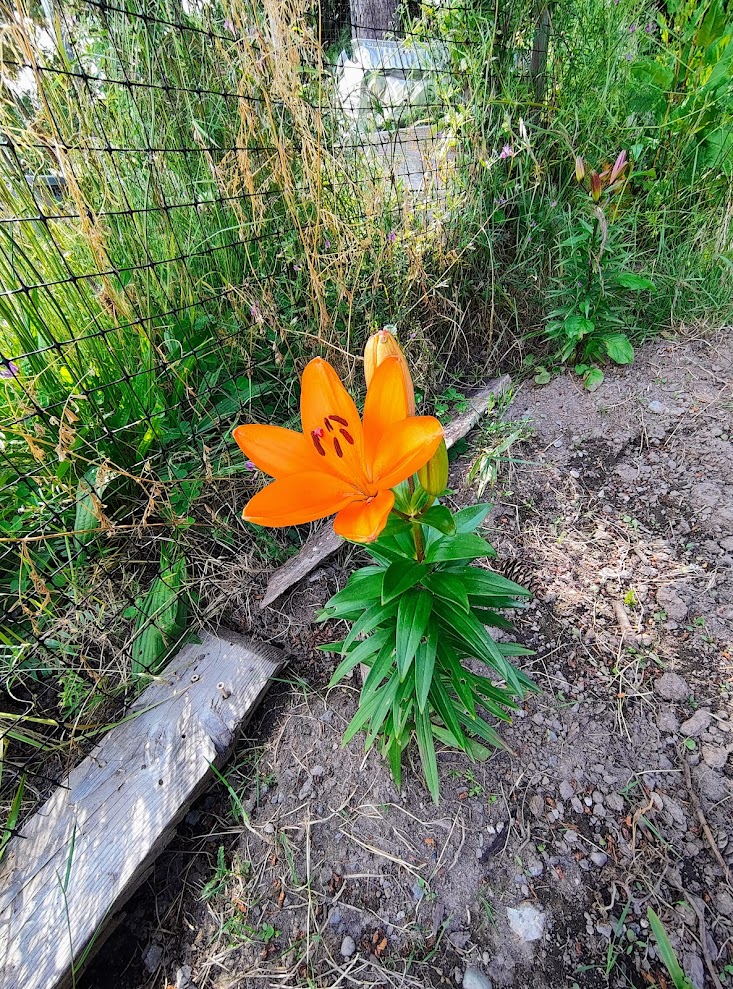
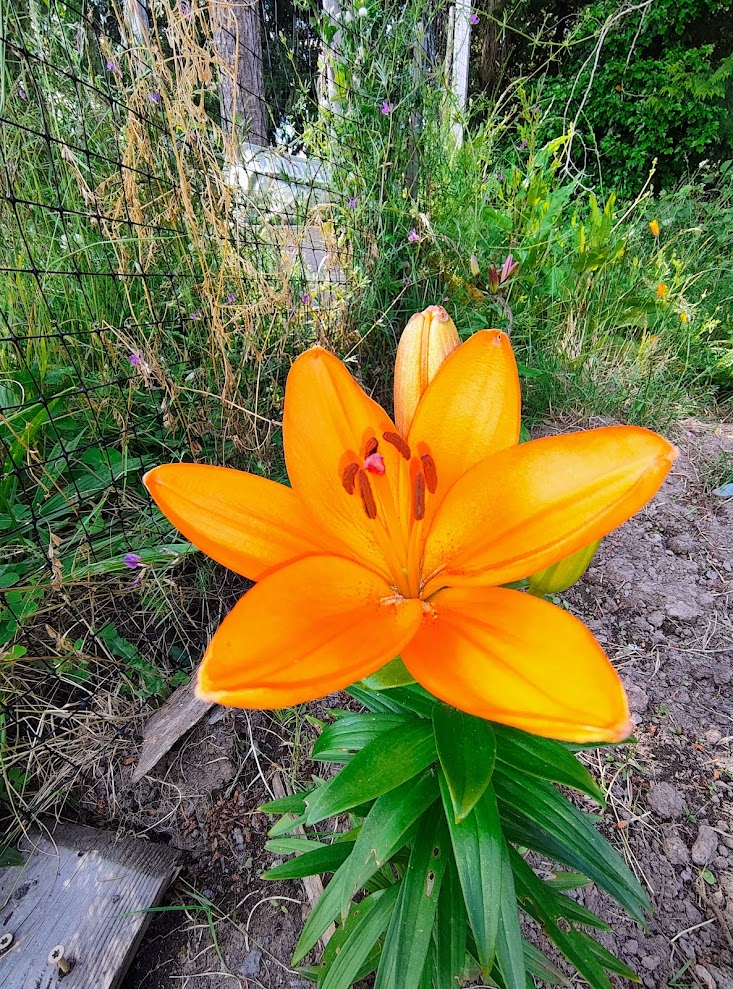
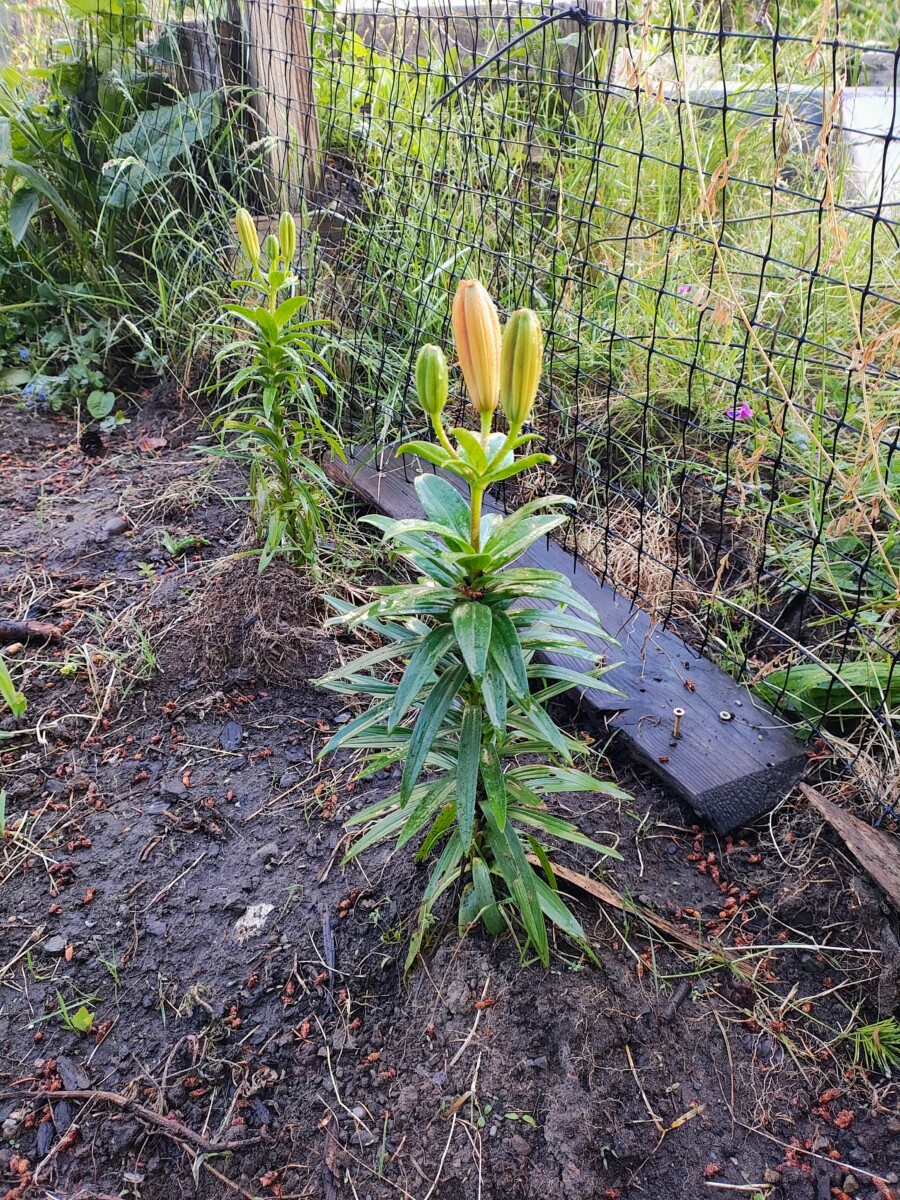
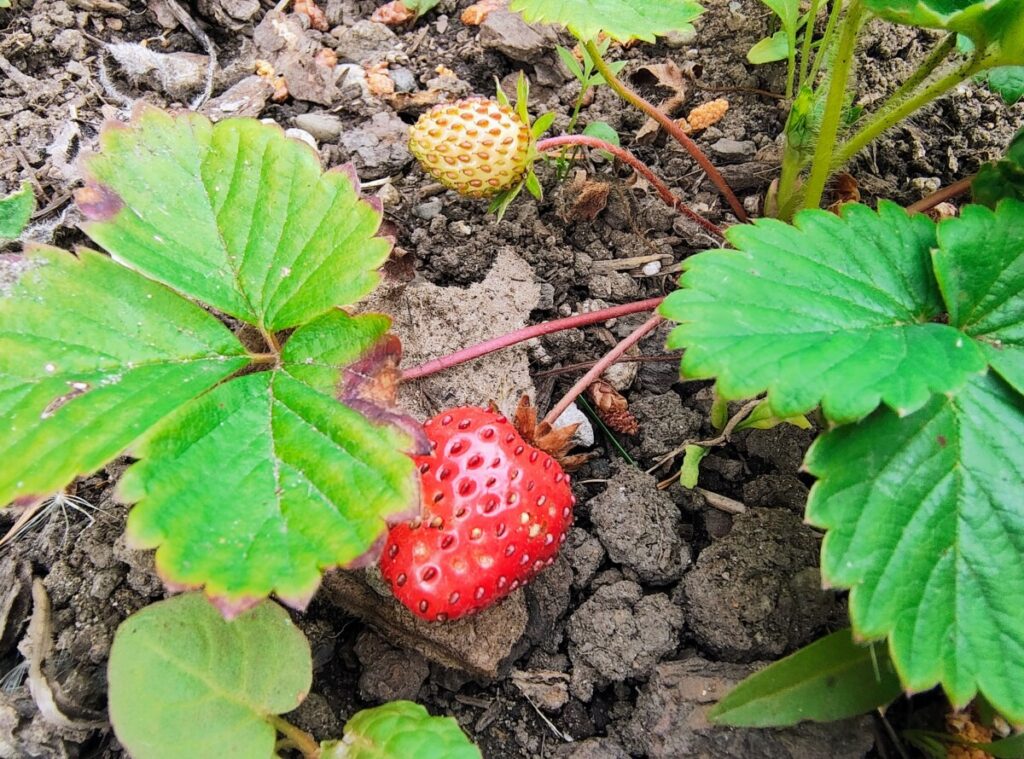
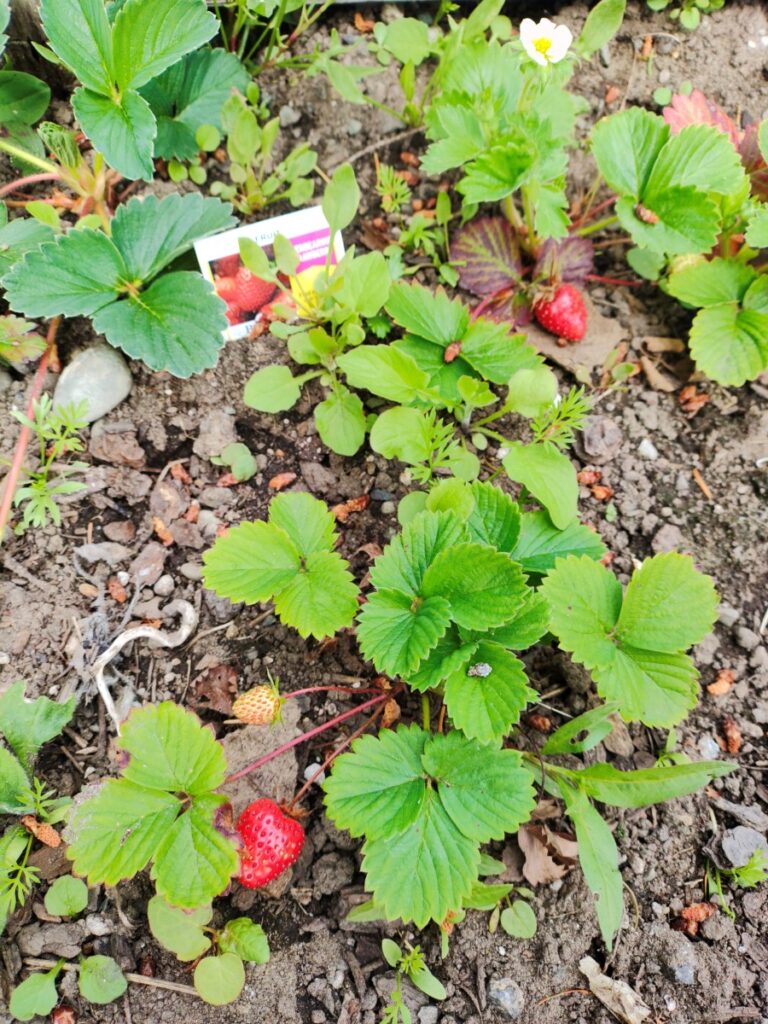
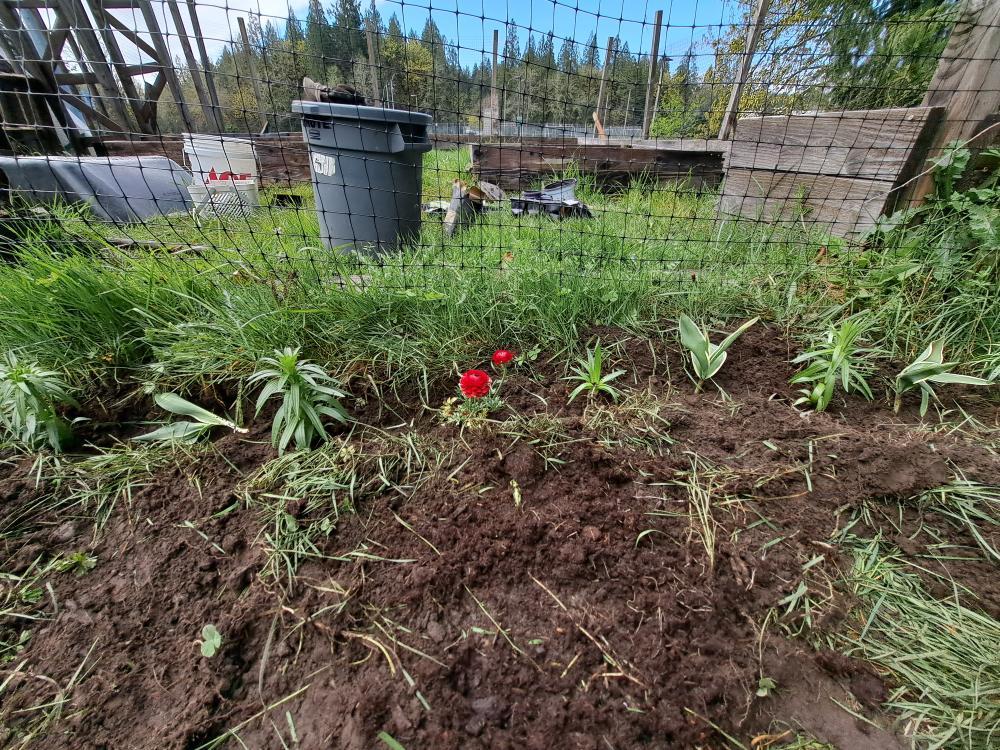
A long awaited blooming lily

Set Up – Week X

The featured illustration above was drawn and gifted to me by my friend, Zinnia. A portrait of me as a honeybee for my birthday.

Fourth week after installations

Beekeeper Out of Order

Sadly, this week I have been facing health issues and have not been able to manage much. I’ve stopped by the garden twice this week to do some quick work. While watering the garden, I thought some plant update images would be appropriate.

I checked up on the log hive to see how the colony has been getting back to business after last week’s inspection. Their water dispenser needed refilling, so they must have been thirsty this week. I topped off the sugar water feeder, though foraging workers appear to be productive and large in number.

I believe the log hive may be reaching its maximum capacity of honey stores and workers for the cavity’s small volume. This is based on the bee’s sugar water consumption, forager numbers, and what was observed during the Week XI Hive Inspection: significant stores of sealed honey and the amount of sealed brood. Queen cups were also observed in the log hive, which may soon be used to rear a new daughter queen if the colony prepares to swarm.

As for the control hive, I am disappointed that I have not been able to make it out to see them since Week VIII. I know that Mario is making sure that he is well taken care of, but I hope to be able to visit them soon.

Set Up – Week IX

Third week after installations

Log Hive Inspection #1

On Wednesday this week I scheduled a full inspection of the log hive colony with my friends to check on the progress establishing brood and resources. My friend Eli and I donned our gloves and veils while my partner Harry stood back to take photos.

We’re using pretty minimal supplies to disturb the bees as little as possible:

  • A smoker to distract bees and mask our scents; the smoke will drive the bees into the hive instead of flying around us. They will begin consuming honey to prepare for an emergency swarm, as they are sensing that their hive is burning and they need to relocate. The smell of the smoke can also interrupt their alarm pheromone to keep the bees from becoming agitated and marking us, as well as covering our mammalian stink. The fuel we are burning in the smoker is wood shavings provided by TESC woodshop.
  • A spray bottle of 1:1 sugar water solution; this is also used to distract and calm the bees, but with a sticky tasty treat.
  • A set of frame grips to safely lift and maneuver frames for examination. It can be difficult to remove frames by hand without damaging comb or harming bees, and when a frame is as large as mine are, they can be very heavy with honey, pollen, brood, and bees.
  • A paint scraper/hive tool used to pry apart the top bars of the frames. Bees use propolis and wax to try and fill in cracks in the hive, and usually try to secure the spots where their combs or frames connect with the cavity interior. This commonly results in frames being stuck together and to the hive’s top rails.

Some disturbance of propolis or wax is needed to pull out frames for examination, but we are attempting to keep as much intact as possible and to not remove materials from inside the hive. Bridge comb was present crossing between a few of the frames, which was broken apart upon removal. It will likely be quickly repaired, as none of the wax was removed from the hive. We make sure frames are replaced in the same order and orientation as they were prior, as reorganization can be disorienting and therefore disruptive for colony progress.

On the left is a honeybee life cycle diagram from the Beekeeping for Dummies series and webpage. The image on the right is from my hive! This is a piece of perpendicular bridge comb with brood that was broken when we removed the frame. I thought it was so cool because it looked just like the diagrams I’d seen in beekeeping literature describing the progression of growing brood, but in real life!

First impressions were that the colony had maintained their large population. Workers covered every frame and still flew in and out of the hive around us. I did not see any dead bees in the hive or around the hive entrance where they would be disposed of.

It had only been 17 days since the colony had been installed, which is not long enough for any worker or drone brood to emerge (see diagram above), but every frame had some amount of capped brood. Four of the frames were nearly covered in brood, and some appeared to be larger drone cells. We checked for queen cells and found 2, but neither appeared to have been hatched open or containing any eggs.

This leads me to believe that the colony population will explode within the next two weeks with many workers and a few drones. With the number of bees already in the hive, this mass-emergence may push the colony’s population close to the limits of the cavity’s capacity and induce a swarm within a few weeks. It’s very exciting news, as the intention of the log hive is to produce many swarms. I’ll be deliberating how to manage this in the meantime; whether to perform an artificial swarm, or split, or to try and catch them when they do swarm.

On the rough sawn walls of the hive, I saw some propolis deposition as I had hoped; bright orange droplets made from collected tree resins. Workers should continue to create a propolis envelope around the hive to seal and protect its interior from moisture, parasites, and pathogens (read more about the the details and reasoning for the hive’s design by clicking my green button).

Wax comb had been drawn out on foundations across the whole hive from edge to edge. The tops of three of the frames had significant amounts of sealed honey on both sides. I did not see very much pollen being stored, but I have observed many workers returning to the hive with corbicula, or pollen baskets, full of bright orange pollen.

Set Up – Week VIII

Second week after installations

Log Hive Progress

This week has been very warm and sunny, bringing many blooming flowers for hungry bees. My colony has been extremely active, able to drink over 20 oz. of 1:1 sugar water each day! I won’t try to give them more than 80 oz. a week to keep them from becoming honey-bound and needing to swarm too early, but they are certainly consuming enough to be establishing themselves well.

Because of the heat, I saw many thirsty bees collecting water from a dispenser with an easily accessible grate I’ve provided, as well as a small bowl of water I left out nearby. I’ve seen many bees in my garden drinking up droplets after I water and performing some welcomed pollination among my flowers, veggies, and berries.


Control Hive Progress

Visiting Mario’s property to check on the control hive, I received some exciting news. My colony was still doing well, but a new swarm had moved into the hive during the week while the conditions were perfect. Mario thought this swarm was also rather small, so he decided it would be best to combine this swarm with my weak control colony.

This was great responsive management, and Mario easily moved the newly inhabited box on top of the control colony’s box. A newspaper was left between the boxes to temporarily separate the colonies that they will chew through. The weaker queen (likely from my control colony) should be dispatched by the swarm colony’s queen, and the smell of the surviving queen’s pheromones will fill the hive uniting the workers under her lead.

Mario left two frames full of honey from the old hive out on the ground in front of the control colony. On these frames, we can easily check in on nearby pollinators taking advantage of a free meal. On these frames you can see many foraging honeybees as well as multiple species of bumblebees.

The honeybees seemed to be vastly different colours, suggesting they don’t originate from the same colony. None of these bees were behaving aggressively to keep others away, behaving very calmly together. This leads me to believe that the two colonies having been combined are integrating well without major issue.

Set Up – Week VII

First week after installations

Log Hive Progress

The swarm colony moved into the log hive is doing extremely well, with many foraging working flying in and out of the entrance. I am really glad to have such a strong colony living in a hive that I made. I can’t wait to see how they do in their new home, and hope that they respond well to the specific architectural details I’ve included in the hive’s design.

(If you’re curious about the design phase and hypothesis, click my green button)

I will be waiting about two weeks before I open up the hive for a full inspection. This way the bees will have an undisturbed change to make progress drawing out wax comb, collecting resources, and begin egg production.

Until then, I will be providing the colony with a 1:1 sugar water solution and working in my garden next to the hive.


Dead Hive Cleanup

This weekend, I spent some time working with Mario at his property after checking up on my second hive. The control colony is few in number but still hanging on, only covering a single side of a frame.

Mario had a hive on his property which had housed a colony the year prior, but did not make it through the winter. He guessed it was humidity that killed that colony, as they had plenty of resources left over, with many dead bees on the frames and bottom board. Mario wanted to remove what frames and boxes that were still viable without much mold or decay. The resources in this old hive would likely attract my bees, as well as neighboring bees and perhaps even swarms, and could possibly transfer harmful pathogens between colonies.

What frames could be saved were placed in a clean Langstroth box and left out in the original hive location. The moldy frames and boxes were disposed of in the trash. Hopefully a swarm finds the cleaned hive and decides it will suit their needs.

These are some cool images of the old frames from the hive. Many frames contained sealed honey (pale yellow), bright orange and red pollen, and fuzzy grey-green mold.

Set Up – Week VI

Plan Bee

Log hive installation

I got in contact with the seller I purchased bees from, and received some disheartening news. They told me that my 4 lb. package of of bees has been lost in transit for two weeks. This would likely be too long for the colony to survive with so few resources. After recieving this news, I began to worry about not having any colony to observe for my project, and upset that “my” bees had died.

Miraculously the next day, my boss Cathy told me that her husband, Damien, caught a swarm on their property and would agree to it sell to me. We waited until 8 pm when the sun was going down for the bees to calm down to be moved in to the log hive. Cathy and Damien’s help, along with my partner and my friend Eli shown in photos, this HUGE colony was transferred into the log hive. The workers completely covered 5 deep frames, and must have been about 4 or 5 lbs. After an hour, we were able to get all the bees into the hive’s cavity and closed it up to let the bees rest and get acquainted with their new home.

The following day, the colony is very lively, with many workers taking orienting flights to memorize their surroundings. They’ve already emptied a full bottle of sugar water, so I can see myself having to do frequent refills. I will be waiting two weeks until I perform a full hive check, so the colony won’t be disturbed too early.


I Stand Corrected

Control hive installation

The package of bees was not lost in transit, only delayed for two weeks. I would have believed that a packaged colony in the postal service would not be able to survive this long, but I stand corrected. On arrival, two-thirds of the colony were immobilized in the bottom of the crate. The survivors were clinging to the top of the crate around their queen, as far as they could from death and disease. The bees had been in the package so long that their sugar water can was empty and they had begun to draw out wax comb around the queen clip! I could not see whether the queen was still alive in the clip, though the behavior and proximity of her workers leads me to believe that she has survived.

Seeing what was meant to be my advantageous and resilient colony in such deplorable conditions shook me greatly. I feel personally responsible for the fact that this situation only occurred upon my request. This was a first hand glimpse of the downsides of commercialized beekeeping. I am extremely thankful that I was able to source a local swarm to move into the log hive; it suits the criteria of my experiment far more than this colony would.

Despite their poor conditions, these bees still needed a home. I had to do a quick scramble to find resources and a location to house this colony as TESC Organic Farm recently relocated their beekeeping supplies (unknown to me). My partner suggested we ask their boss/professor, Martha Rosemeyer, and her husband, Mario, if they would be interested in housing the colony on their property near TESC. They happily agreed, telling me they had prepared a hive the day before for bees of their own.

After being called by the post office Saturday morning, I went to pick up the package as soon as they opened and brought it to Martha’s property. Mario has successfully managed bees there before, and has agreed to keep an eye on this colony for me. With Mario’s help, we removed the queen clip and removed its cork, setting it in the bottom of a single deep hive. The remaining workers were brushed into the hive, with some stirring in the bottom of the crate. We decided to spread out the dead bees so any trapped survivors could crawl out, as well as any left in the crate. These bees were initially lethargic, but seemed to perk up and begin flying around after being opened up and moved. We left the colony with resources and will now watch to see if they can survive to repopulate the colony.

My hope is that this colony can pull through such a great loss in numbers, and serve as a control for my research. What happened to these bees is a testament to the fate of many commercial honeybee colonies, and can fairly represent the life history other colonies with similarly poor management and selection.

Set Up – Week V

Waiting For Bees…

My package of bees should be priority shipped this week, so I’ve been tracking their postal progress and waiting for the call from the post office. They could be here any morning! In the meantime, my goal has been to prepare everything I’ll need for their installation.

  • I finished putting together all the frames with their foundations, and brought them to their final location in the hive.
  • I also brought the remains of the first beehive I tried to make, which broke into three sides. I reassembled the hive with its base, lid, and one wall missing where a milk crate can slide in like a drawer for storage.
  • I collected the equipment I’ll be using to monitor my bees that I’ve loaned out from TESC’s Science Support Center. This includes a compass, anemometer (measures air flow), CO2 flow meter, condensation/temperature meter units, infra-red thermometer, and a spring scale for weighing frames.
  • I’ve made 2 L of 1:1 sugar syrup and some pollen patties to feed the bees. These have been stored in my car with the rest of my beekeeping supplies, including my veiled jacket, gloves, smoker and fuel, tools, monitoring equipment, and honey comb as a “house warming gift”.

As for the garden, the nearby water spigot has been turned back on by TESC grounds after I put in a service request. Now I can finally water what I’ve planted, and even plant some more! Four of my tomato plants have gone mysteriously missing….. so I’ve planted two replacements starts. I’ve also pulled a bunch of weeds around the outside of the garden to clean it up.

Set Up – Week IV

Finishing Foundations

My order for beeswax foundations was ready this week, so I drove to Rochester, WA to pick them up from Beeline Woodenware. These foundations are made with the structural wires running the short way across and hung with the tops of these wires held under a tacked down strip. My design requires that I hang these foundations side-by-side the opposite way, held from wires running from top to bottom on the short edge.

Instead of heating up the wires I needed to embed them in the foundation, I decided to cover them with wax strips cut from excess foundation. Using an old hair dryer I purchased from an estate sale last weekend, I warmed the wax strips with the wire beneath until it was pliable enough to press into the foundation. When the wax cooled, it was strong enough to hold together with the wire held inside.

I’ll spend the rest of the week finishing my foundations and hanging them in their frames.

Set Up – Week III

With help from Don Jensen, TESC Woodshop Technician, we drove the hive’s legs into the ground to keep it stable and upright. Using a sledgehammer and a piece of sacrificial 2×4 on top, we pounded the hive down ~5″ with a slight forward tilt to maintain drainage.

A Grounded Hive


Making Foundations

I have been attempting to make my own beeswax foundations for my hive due to the frames’ unusual dimensions. I’ve been melting down beeswax given to me by a local beekeeper, and pouring it into a double-sided silicone mold with twisted wires lying longways for support. This process was working, but I soon ran out of beeswax. I made a few attempts to order more, but the wax I’ve received was tainted with paraffin, which can be toxic to honeybees.

I decided to purchase premade foundations from a local beekeeping supply store to ensure that what I receive will be 100% beeswax. I ordered deep and shallow foundations from Beeline Woodenware in Rochester, WA. I’ll try to melt in my supporting wires longways, and use one of each size foundation to fill each frame.

Set Up – Week II

Gardening

More plants have been purchased and planted in the garden next door to the hive. This haul includes marigolds, strawberries, peas, tomatoes, peppers, and flower bulbs. Over spring break, I seeded the garden with veggies and flowers including kale, lettuce, thyme, carrots, sunflowers, nasturtiums, onions, garlic, and the three sisters (corn, squash, beans). By the time my bees arrive at the end of the month, they should have a blooming garden to visit.